What is the WhatsApp Carousel?
The WhatsApp Carousel feature allows businesses to present content in an interactive format by displaying a series of cards with images, videos, and text, all within a single message. Users can swipe through these cards to explore multiple products or options, making it a dynamic way to engage customers. Each card can have action buttons to direct users toward specific actions, such as visiting a website or making a purchase.
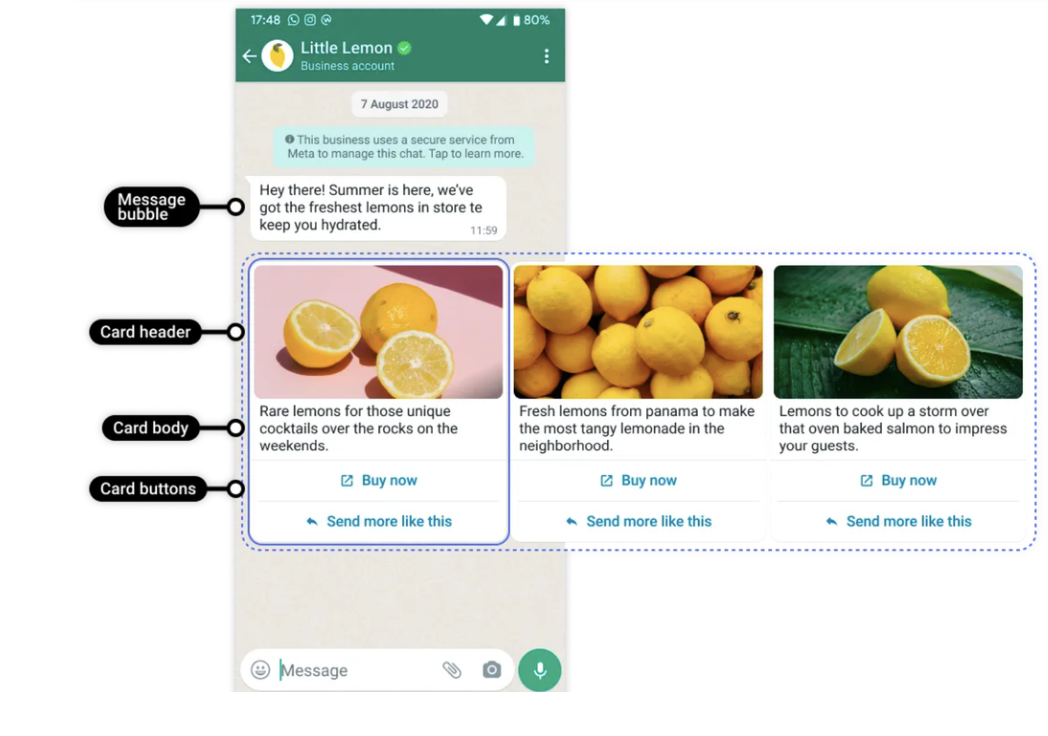
Components of the WhatsApp Carousel
| Component | Description | Character Limits and Specifications | Additional Details |
| Message Bubble | This is the introductory text that provides context to the carousel. It appears above the carousel cards to explain the content of the message. | – Character limit: 1024 characters- Supports variables | – Formatting options: You can use bold, italics, strikethrough, and emojis.- Add variables to personalise the text, such as user name or specific details to make the message more engaging. |
| Carousel Cards | Up to 10 cards can be added to a single carousel. Each card contains an image or video, a short description, and action buttons. | – Max cards: 10 | |
| Card Header (Image/Video) | Media includes either images or videos displayed at the top of each card. The media format selected for the first card applies to all subsequent cards. | – Image formats: JPG, JPEG, PNG- Video format: MP4 | – The same media type must be used for all 10 cards.- If you use an image in card 1, all subsequent cards must use images. Similarly, if you use a video in card 1, all subsequent cards must use videos. |
| Card Body | A short description displayed under the media file for each card. This text gives users more context about the product or service being displayed. | – Character limit: 160 characters | – Keep descriptions clear and concise.- Ensure the message aligns with the media to give users a cohesive understanding of each card’s content.- Ideal for product descriptions or key benefits. |
| Buttons | Each card can have up to two action buttons. These buttons help users interact with the carousel by responding to a quick reply or performing an action (e.g., visiting a website or making a call). | Max 2 buttons per card- Button label character limit: 25 characters | – Button Types:1. Quick Reply: Allows users to send predefined responses.2. Call to Action (CTA): Can be configured for either a website URL (static or dynamic) or a phone call. |
Step-by-Step Guide to Creating a WhatsApp Carousel Template
1. Log into Your Dashboard
- Start by logging into your Verloop.io dashboard.
2. Navigate to WhatsApp Business Account
- Go to the WhatsApp Business Account section from your dashboard.
- Click on Templates, then click New Template to start creating a new carousel template.
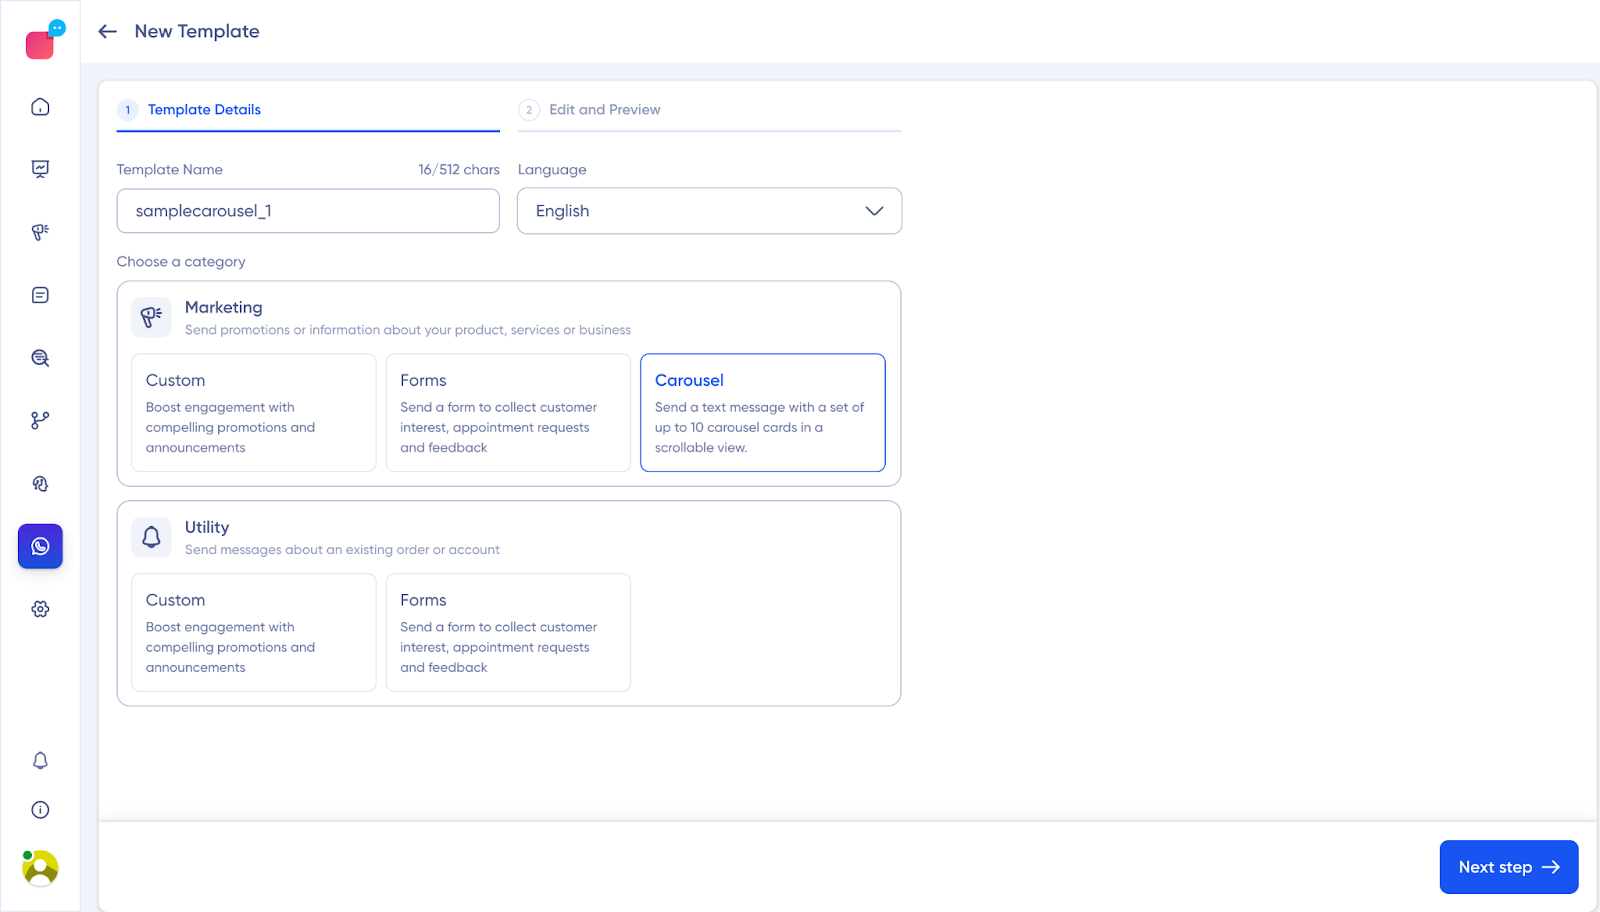
3. Enter Template Details
- Template Name: Enter a unique name for your template (up to 512 characters).
- Select Language: Choose your preferred language from the available list.
- Select Category: Under Marketing, select the Carousel as the category for your template.
4. Add the Message Bubble
- Enter the Message Bubble text that will introduce the carousel (up to 1024 characters).
- You can format the text using bold, italics, strikethrough, and add emojis.
- Variables can also be used to personalise this text dynamically based on the user interaction.
Example: “Swipe through to check out our latest collection! 🎉”
5. Add Carousel Cards
- You can add up to 10 cards in the carousel.
- For each card:
- Upload Media: Drag and drop an image (JPG, JPEG, PNG) or video (MP4), or browse to upload manually.
Note: The media type selected for the first card will be applied to all cards. For example, if the first card contains an image, all cards must contain images. If the first card contains a video, all subsequent cards must also use videos.
- Add Card Body Text: Enter a short description for each card (up to 160 characters).
Example: “This eco-friendly water bottle is available in multiple colors. Click below to explore!”
- Add Buttons: Each card can have up to two buttons. The buttons configured for the first card (button type and label) will be applied to all other cards.
Button Types:
- Quick Reply: Allows users to select a predefined response.
- Call to Action (CTA): This button can either:
Visit Website: Enter a static or dynamic URL for the website. For static URLs, enter the direct link. For dynamic URLs, you can add variables for personalised links.
Call Phone Number: Enter a phone number with the country code to allow users to make a call directly from the button.
Button Label: You can enter text for the button label (up to 25 characters).
Example: “Shop Now” or “Call Us”.
6. Preview and Save the Template
- After entering all the details for the template (message bubble, media, body text, and buttons), you can preview the template to ensure everything looks and functions as expected.
- Once you’re satisfied with the design, click Save.
Sending the Carousel Template via Outreach
Once your template is saved and approved, you can use it in an outreach campaign.
1. Navigate to Outreach
- From the Verloop.io dashboard, go to the Outreach section.
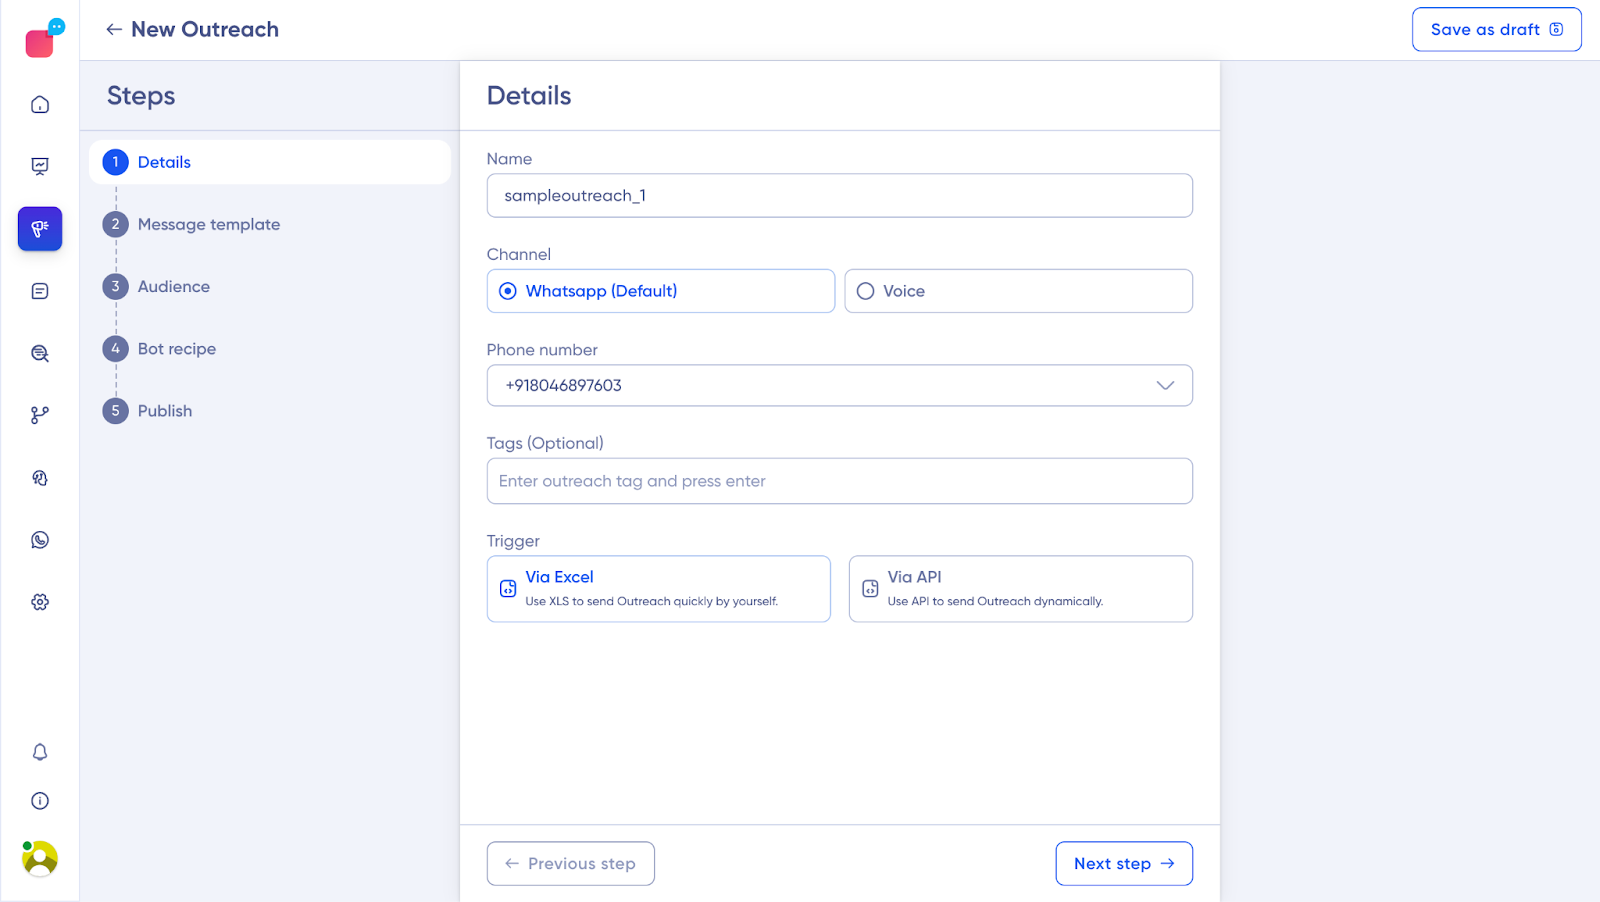
- Click on New Outreach to create a new outreach campaign.
2. Fill in Outreach Details
- Outreach Name: Give your outreach campaign a name.
- Channel: Select WhatsApp as the communication channel.
- Phone Number: Choose the phone number from which the messages will be sent.
- Trigger: Specify how you’ll trigger the outreach, either via Excel or API.
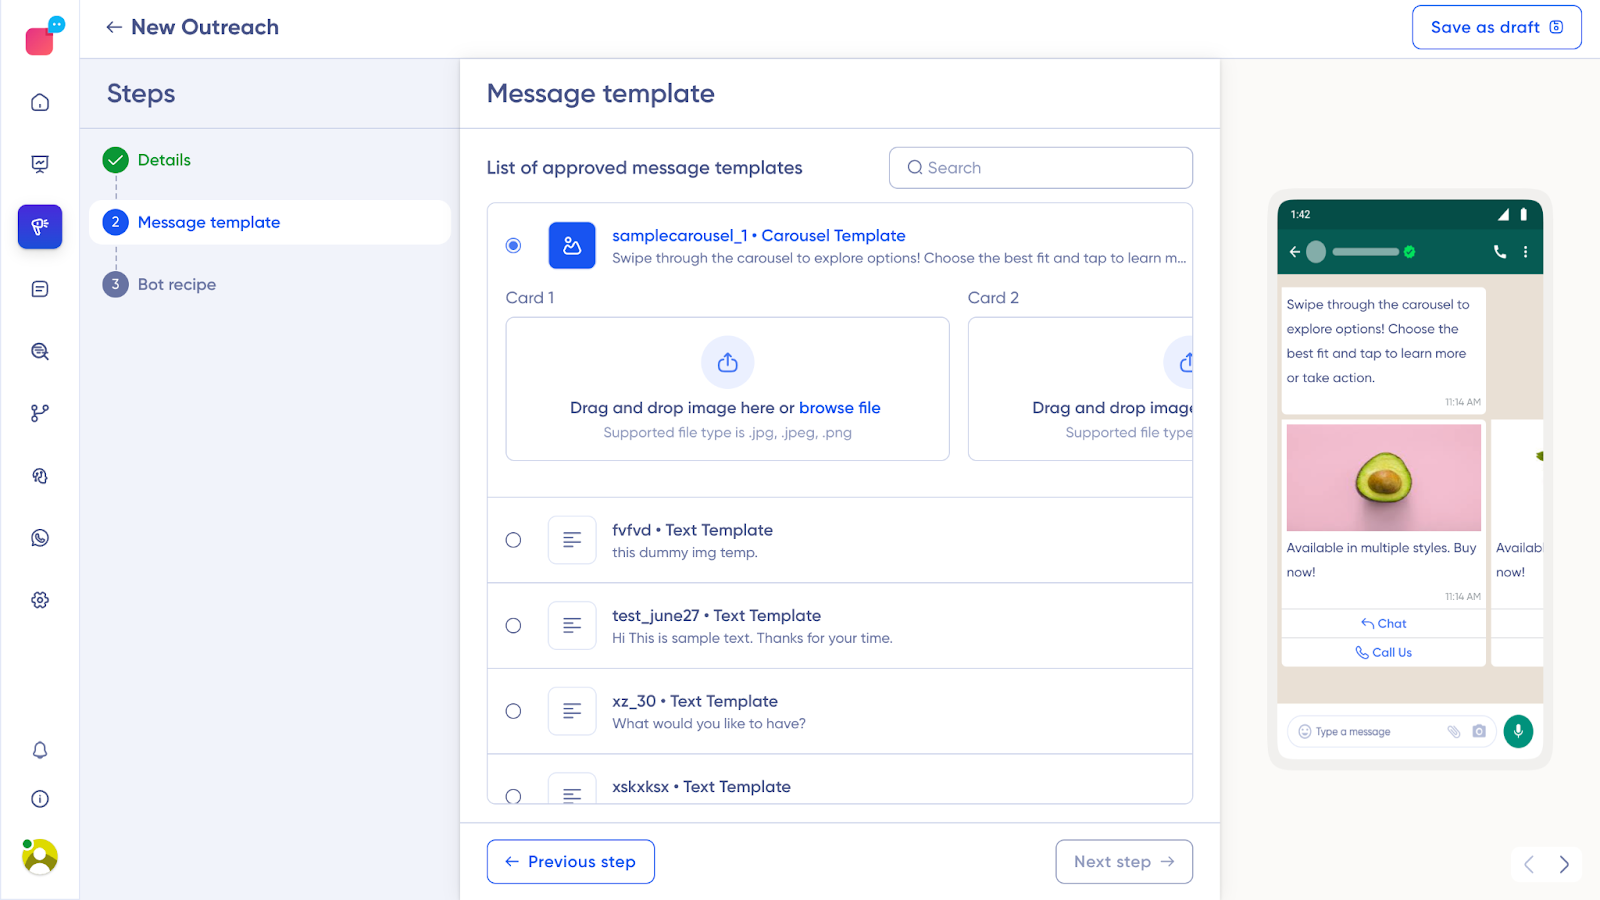
3. Select the Approved Template and Add Images
- Choose the desired approved carousel template from the list of available templates.
- For carousel templates, upload the images for each card in this section.
4. Via Excel – Audience Settings
- Here you can upload your audience list.
- Under Audience Settings, download the provided XLS file template. This file will be structured with columns for each card and its variables.

- Open the downloaded XLS file. You’ll find a separate column for each card’s variables, allowing you to enter specific values for each variable used in the carousel cards.
For example, if your carousel has three cards, each with two variables, the XLS file will have six columns designated for entering the values of those variables.
5. Publish the Outreach
- For Excel Outreach: Once you’ve filled in the details for each card in the XLS file, upload it back to the platform to complete the audience setup.
- For API Outreach: Click Publish. In the “All Outreach” section, click on the three dots next to your outreach template. Click on “View Details” to find the API Code.