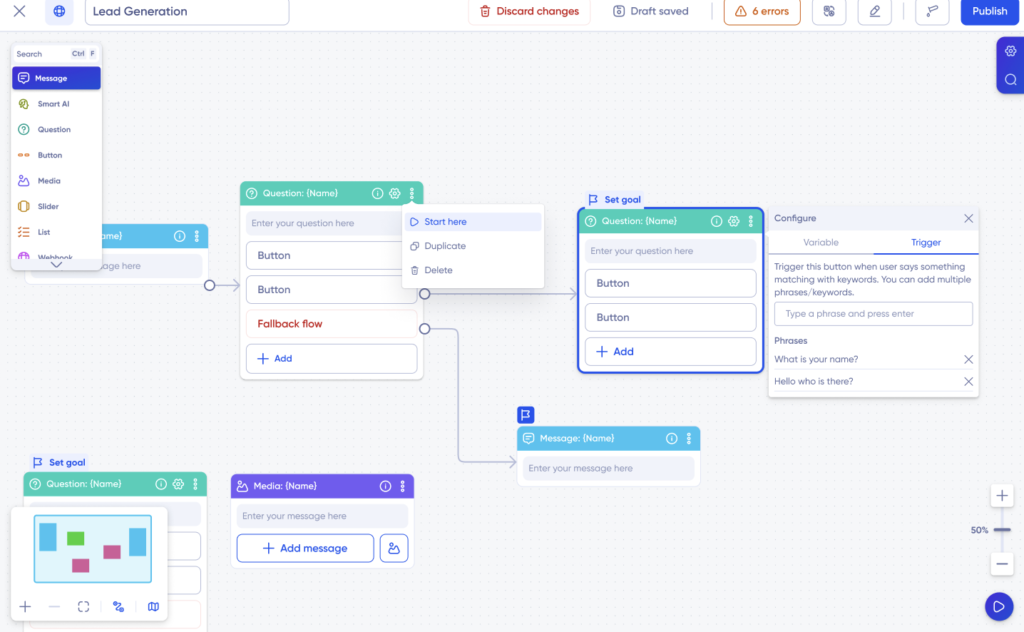
Welcome to SmartAI Block User Guide. This user guide will walk you through the key features of Smart Block and provide step-by-step instructions on navigating through the product.
What is SmartAI Block?
Smart Block allows customers to create dynamic and conditional conversations with users. It enables the design of prompts with multiple intents and conditional questions, allowing bots to understand context and ask specific questions based on user input.
Using Smart Block in Conversations
Smart Block can be used to:
1. Figure Out Intent
Recognize the user’s intent and tailor responses accordingly.
2. Ask Contextual Questions
Collect user information through creative, non-repetitive, and human-like questions.
3. Refer to Documents
Utilize the LLM model’s understanding to answer questions, surpassing traditional FAQ models.
Now that we know what Smart Block is, let’s learn how to use it.
Getting Started
1. Logging In

2. Accessing Smart Block
Once logged in, go to the Bot Builder section.
Smart Block will be available as one of the building blocks for your conversational flows.
Smart Block New Features
Smart Block’s prompt feeder allows you to input prompts of varying lengths, select specific parts of the text, and convert them into meaningful elements like intents, output fields, or questions.
Smart Block further enables you to incorporate multiple intents within a single prompt.
Creating Bot Persona
1. Go to the bot builder, and then go to the settings tab shown on the right side of the dashboard. Click on the settings, navigate to general settings, and select “setup a bot persona and confines,” as shown below.

Once you click on “setup a bot persona and confines,” you will see a space where you can describe your bot persona, as shown below.

Then add additional details describing your bot persona in “Details provided here will be used to define the confines/limits of the bot,” which will be used to confine or limit the bot in case of any error response.

Go to the Smart AI Block on the recipe level, and set up the persona and define any constraints or limits for the block.
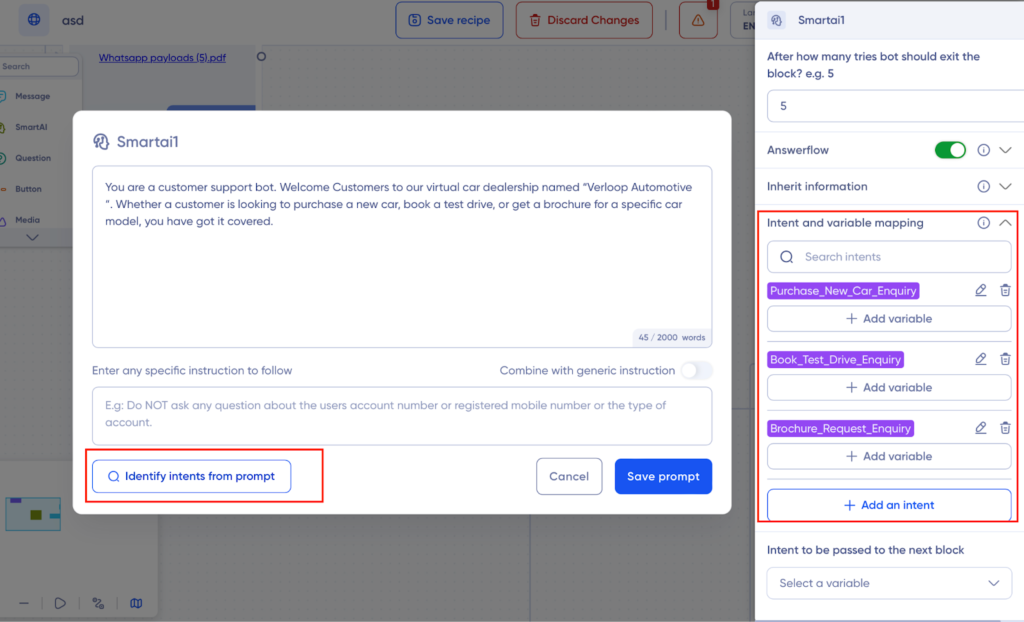
Input intents or prompts to specify your requirements. Use the “identify intents” feature to let LLM-powered models recognise intents automatically. On the right-hand side, review the list of recognised intents.
Intent and Variable Mapping
1. Intent Recognition
Add your prompt and click on “Identify intents from the prompt.” The bot will use this action to start analysing the prompt for intent which it will neatly map out in the right-side smart block setting panel of the dashboard, as shown below.

2. Adding Variables to Intents
Go to the right-side panel where the intents are listed, and click on the “+Add variable” button. Then click on the downward arrow button “select a variable” to select the variable.
Data collected by the bot from the customer against specific intents will be stored against these variables.

Add the description of the variable in the space shown below.

Once you have added all the intents and its variables, click on the main dashboard to save the mapping automatically.
Note:
1. You can establish the priority of intents by designating certain questions or intents as mandatory and determining the sequence in which the bot will present them during interactions.
If there are multiple saved variables, prioritize the mandatory questions. The system will randomly present questions, with a focus on mandatory ones.
2. You can even search intents manually and even add more intents.

Add Additional Data for the Bot
You can add additional statements for more context for the bot, which you were not able to add in the prompt. Add instructions in the “enter any specific instructions to follow” section.
Example: instructions on how the bot should answer the customer, its tone , format etc. can be added here.

Then just click on the toggle “combine with generic instructions” for the bot to accept the new specifications.
Define success criteria under the “If Success” button. Success depends on clear intents and successful answers to mandatory questions.
You can even integrate Answerflow to the Smartblock to help it in instances where a customer poses a question not addressed in the prompt. Subsequently, the Smart block will utilise the AnswerFlow tool’s response internally to generate a synthesised response for the end customer.
Personalised Prompts with Variables:
You can now incorporate variables into your prompts to tailor interactions with specific customer details. This allows for a more personalised and engaging conversation with your customers.
How to use Personalised Prompts:
- In the Smart Block prompt, type {{ to display a list of available variables.
For example, for a customer support bot in the retail industry, you can use the prompt: “You are a customer support bot. Greet {{customer_name}} with ‘hello’ and ask them how their experience was in purchasing from {{store_name}}.”
Here {{customer_name}} and {{store_name}} are variables you can select, if you have defined them earlier.
This allows the bot to personalise the conversation based on the customer’s recent purchase details.
- Select from the options provided to insert the desired variable.
Context-Aware Conversations:
The SmartAI block now supports passing the conversation history as context, enabling the bot to remember past interactions and respond more intelligently.
How to Enable Conversation History:
Turn on the “Enable conversation history” toggle to pass conversation history.
If you have any more questions, you can reach out to us at support@verloop.io
