(Colour: Green)
Use this block to ask your visitor a question. You can also save the user response to a variable. If you mark the question as mandatory, the bot won’t proceed to the next block until the user has given an answer.
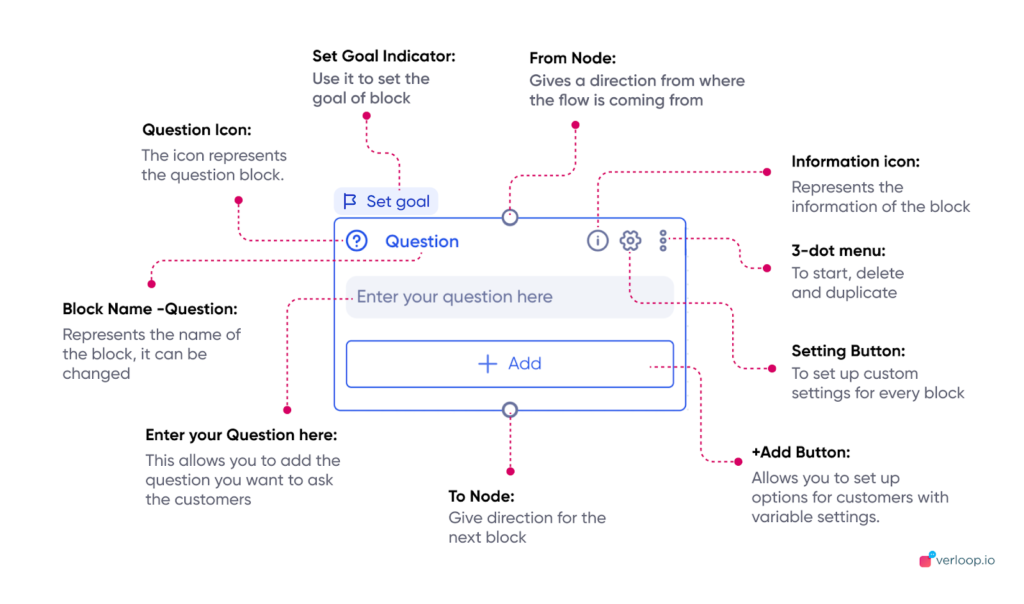
Block Elements
1. Question Icon: The icon represents the question block.
2. Block Name -Question: Represents the name of the block, it can be changed
3. I symbol: Represents the information of block
4. Setting Button: To set up custom settings for every block
5. 3-dot menu: Gives you various block-based settings
6: Enter your Question here: This allows you to add the question you want to ask the customers,
7: +Add Button: Allows you to set up options/buttons for customers with variable settings. Has 20 character limit, you can increase this by reaching out to our support team. More about this we will discuss later.
8. Set Goal: You can set the goal of block
9. Top Node: Gives a direction from where the flow is coming from
10. Down Node: To give direction for the next block
Also, there are side nodes in this block for setting up dynamic responses via a webhook. Learn more about it here.
Button Types
You can set up the button for the customer response trigger in the following ways:
- Variable
- Trigger
Variable configuration
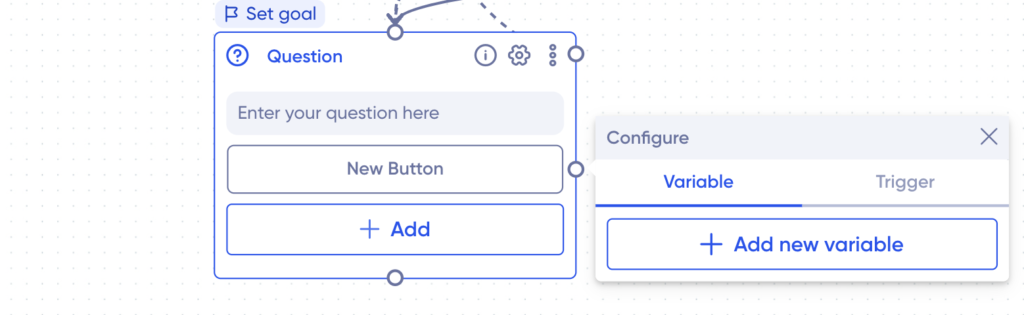
Click on the button to showcase the trigger configuration settings.
Click on +Add new variable
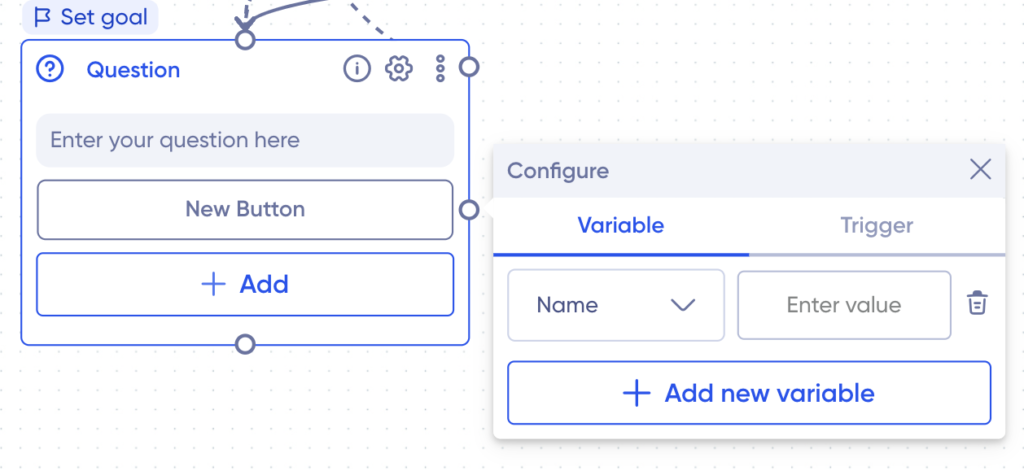
You can click on the variable type drop-down to select the variable you want to trigger for this button. Learn more about triggering and setting variables here.
Trigger configuration
Trigger configuration is for when you want to trigger a response for a matching phrase/keyword.

Add the keywords/phrases you want to trigger the response for by adding in the “Type a phrase and press enter placeholder,” and you are done.
Question Settings
- You can use the 3 dot menu on top to start the recipe from this block, duplicate the block or delete the block.
- This block also offers a setting button on top which you can choose for
General Settings
- Hide message: This setting will allow you to restrict users from typing anything in the message box.
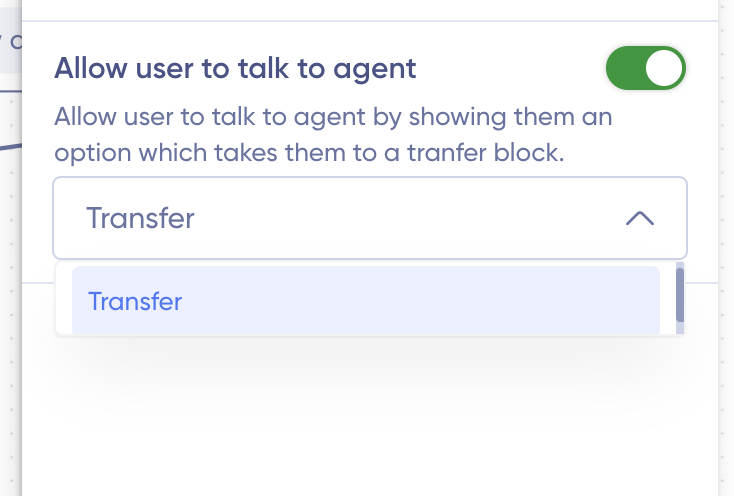
- Allow user to talk to agent: If you want to connect an existing transfer block or add a transfer block automatically, just click on the toggle and select Transfer from the drop down as shown below
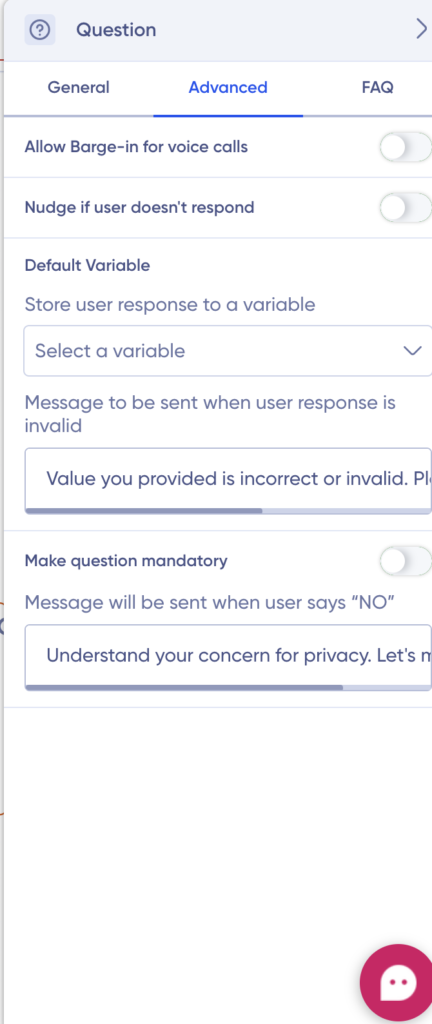
Advanced Settings
Advanced settings allow the following functionality:
- Allow Barge-in for voice calls: On switching the toggle on, it will allow any voice calls through, irrespective of the function you are doing.
- Nudge if the user doesn’t respond: On switching the toggle on, it will allow you to send a nudge message to customers in case they don’t respond.
- Default variable: You can set up the variable response using this setting. Learn more about it here.
- Invalid user response: In case the trigger and variable response you have set, user response does not match to it, you can set up the response message that should be displayed using this setting.
- Make questions mandatory: By clicking on this toggle button, you can make the question response mandatory, and even set the message that should be displayed if the user responds by saying no.
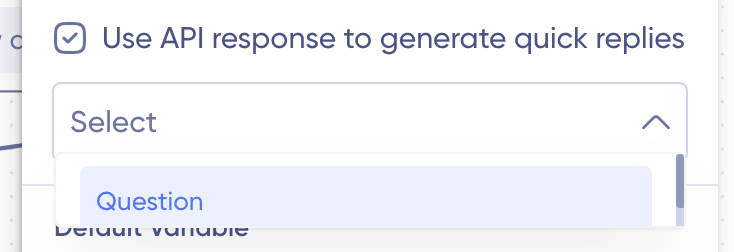
Another setting that would only be displayed, if you have set up the webhook response earlier is “Use API response to generate quick replies.

The dynamic response for the type of block you have selected earlier in your webhook settings can be called here, like shown below. Learn more about setting webhook dynamical response and calling the API here.
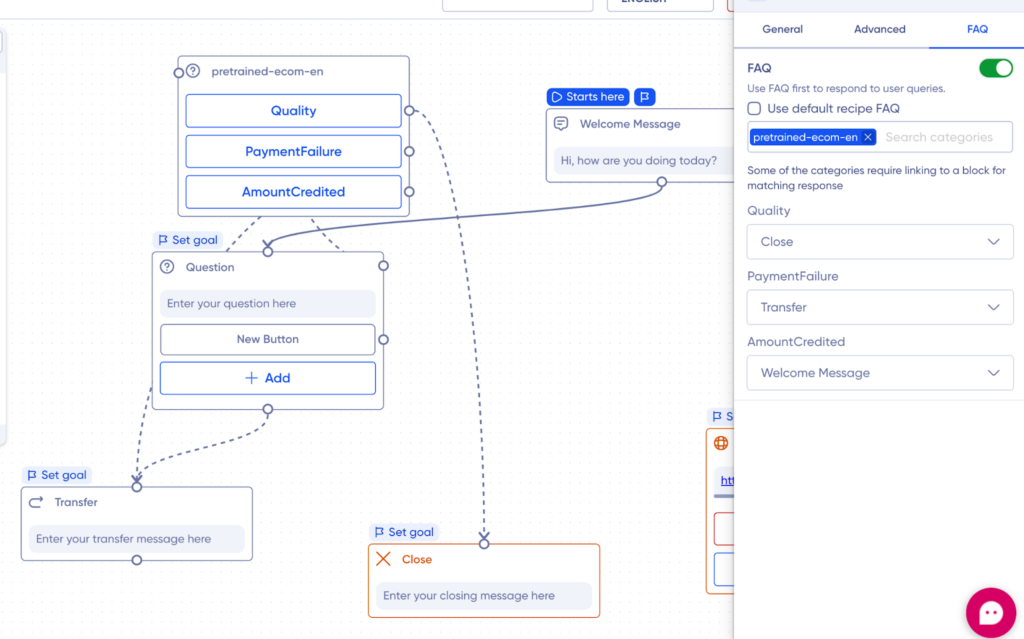
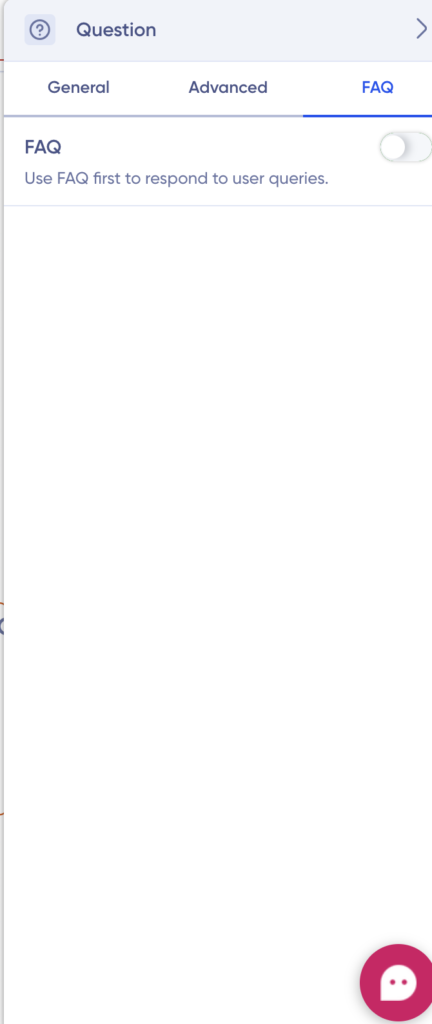
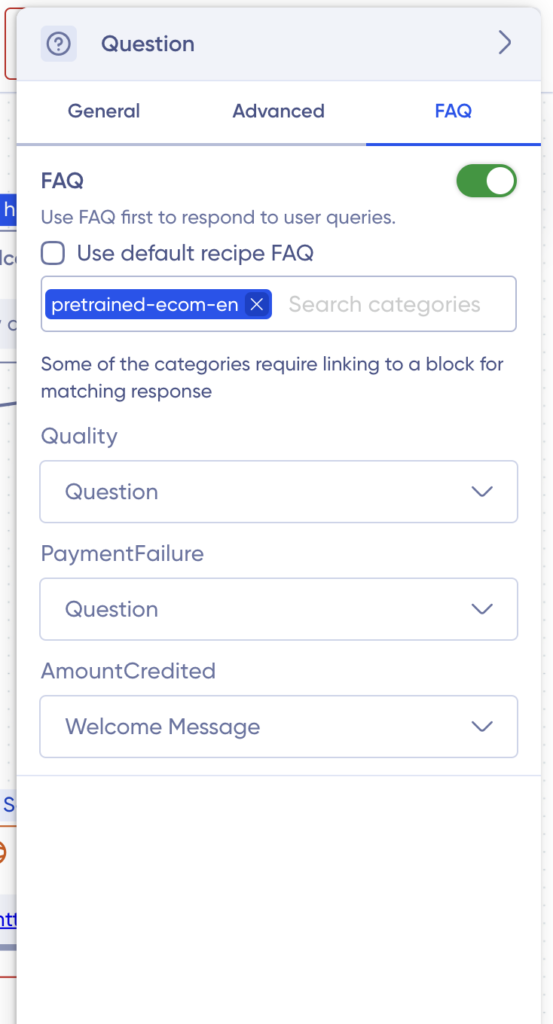
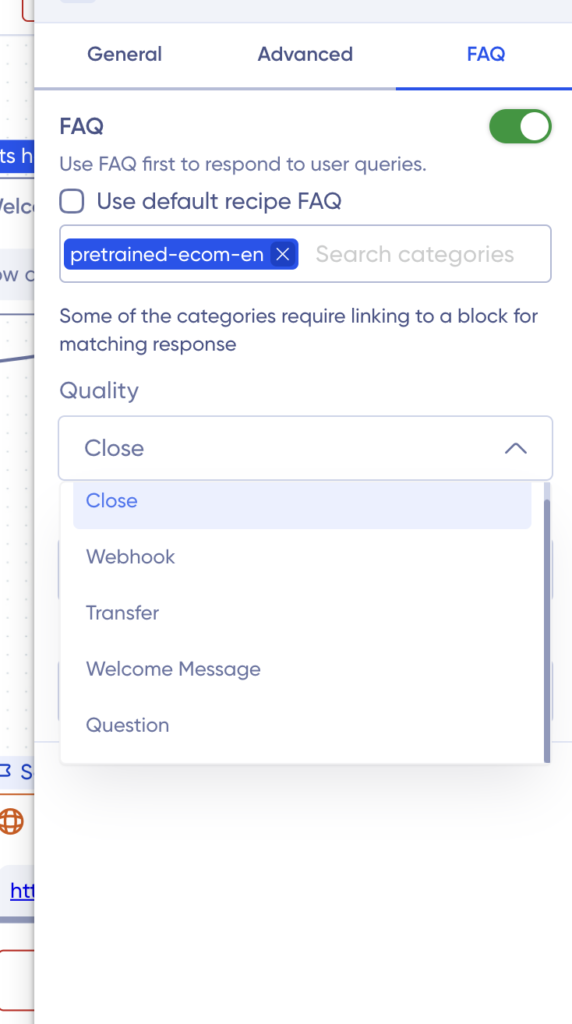
FAQ Settings
You can enable the default FAQ or add custom FAQ question group, through this setting. Learn more about setting FAQ here.
Dynamic Webhook response
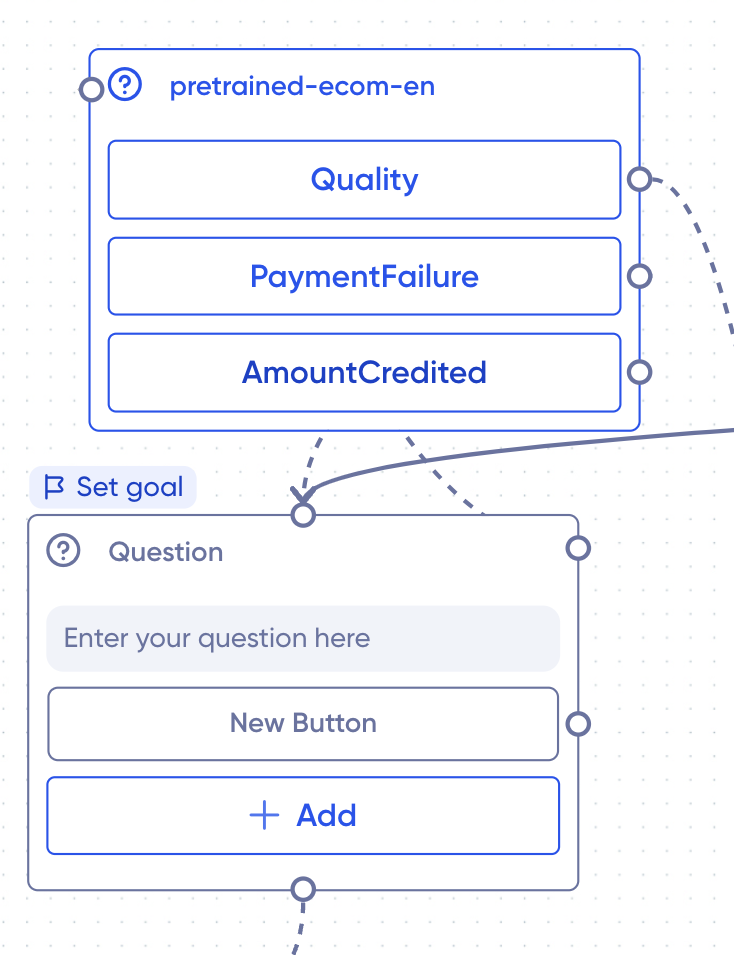
In FAQ settings, if your webhook API response is enabled, the following linked question group will also get displayed.
And the side node will automatically connect them to trigger, as shown below.
If you notice, the pre-trained response buttons above all have node. You can select the block you want them to connect in the FAQ settings from the drop down, as shown below.
And the node will automatically as shown below, connect to the existing block as selected in the above settings.