In the business of customer support, acquisition, or lead generation, the agent plays an important role as agents are the one who talks to end-user. Having an automated chatbot helps in this scenario but yet most companies have dedicated agents to talk to users and solve their queries.
While monitoring chatbot quality and downtime are much easier as it is an automated system, at the same time monitoring an agent is also equally important. But it is not enough to only give the monitoring information to the admin and managers. Agents should be able to see their metrics in order to improve their performance.
The agent account already has some important metrics visible to him/her via a real-time dashboard (RTD). Verloop.io has added one more extremely important metric to the agent dashboard known as agent timeline.
What is the agent timeline?
An agent timeline is the data of the agent’s working hours and the distribution of the same. The agent timeline feature helps the agent to understand where and how they have spent their 9-hour working time.
Importance of agent timeline
Work hour is one of the most important factors in agent performance incentives, and it is important for agents to have this information easily available in order to optimize it right. Agent timeline data will also enable agents to be aware of how they are being tracked by their direct managers.
How to activate the agent timeline?
You need to contact your customer success manager to activate the agent timeline for you.
What does this feature look like on the agent dashboard?
The agent can see their working hour distribution in the form of a timeline on their dashboard below the overall KPI. By default, the timeline is shown for the present day (today). However, the agent can jump to any other specific date by picking the date from the calendar present right above the timeline.
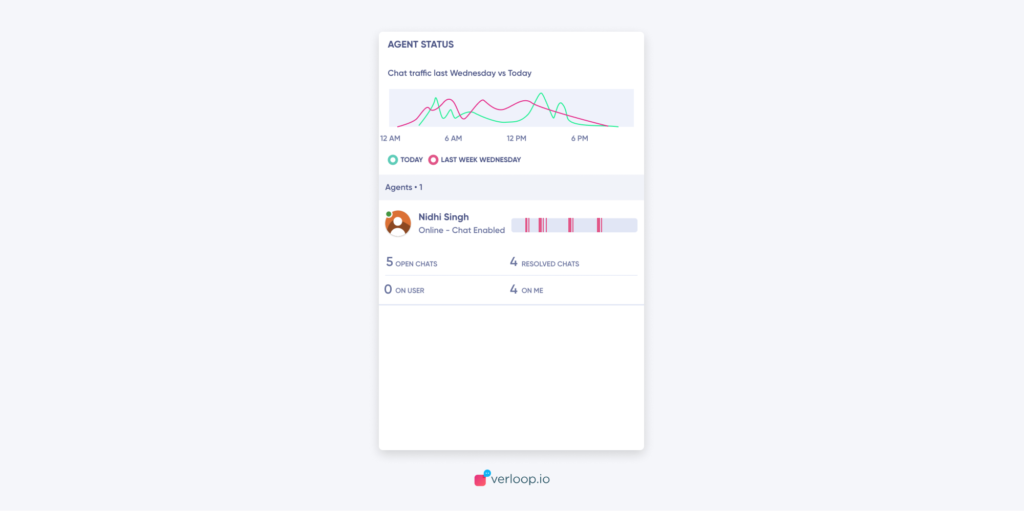
Note: The time filter we have at the right top of the real-time dashboard will not apply to this widget.
The Availability states shown upfront are
- Available for a chat
- Working
- Not working
- Logged out
By clicking the eye icon next to the timeline, an agent can see the overview and breakdown of the four categories mentioned above.

The agent can also do well on more details of timestamps by clicking the ‘view timeline’ button.
How does this data get recorded?
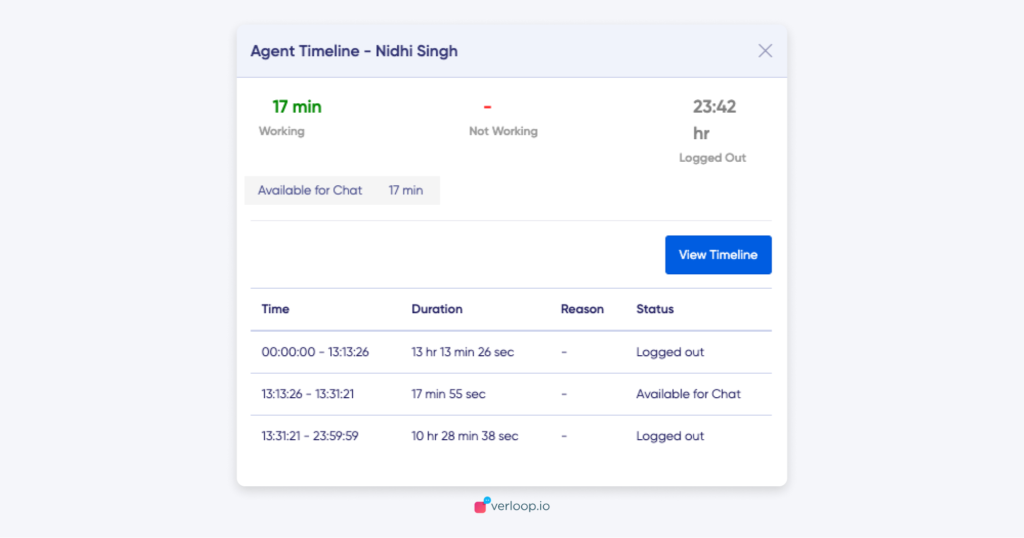
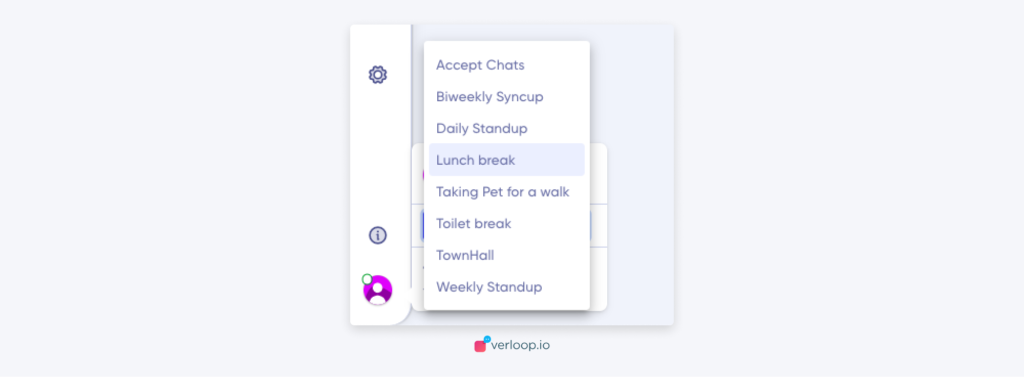
As we can see in the screenshot above the sub-categories are also there in working and not working hours. These sub-categories are to be selected by agents throughout the day basis the activity they are doing. Let’s say an agent is having lunch and hence not accepting chats. so, he can mark his status as ‘lunch’ by using the dropdown in his profile widget and that’s how this data gets recorded in the database.
To change agent status,
- Click on the profile icon on the left side panel
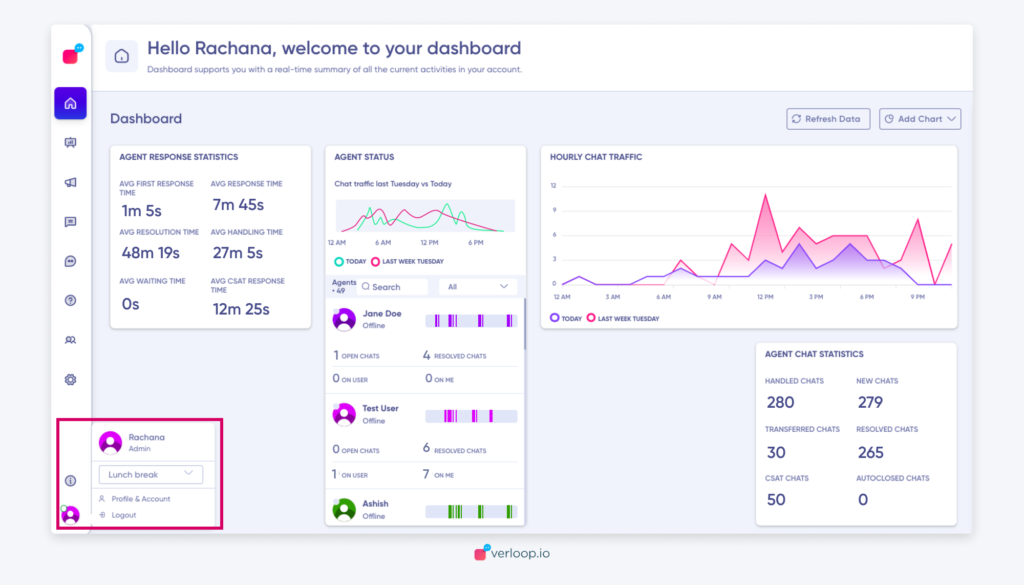
- Click on the drop-down button and select one option from the list.
How to add status to the agent timeline?
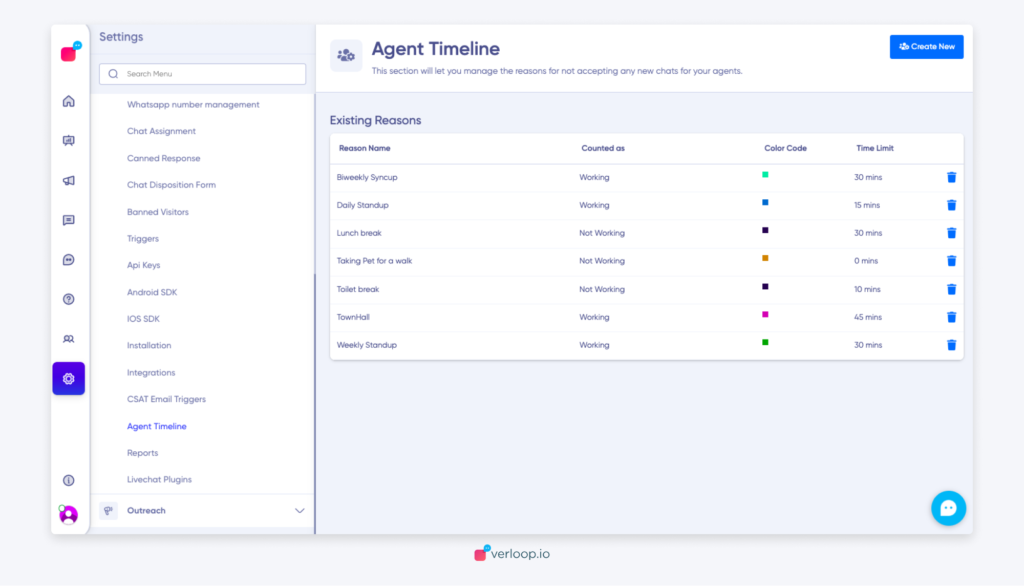
These availability statuses are highly customizable. Admins can edit the list, by following the below steps:
- Navigate to Settings > Chats > Agent Timeline
- Click on Create New button in the top right corner.
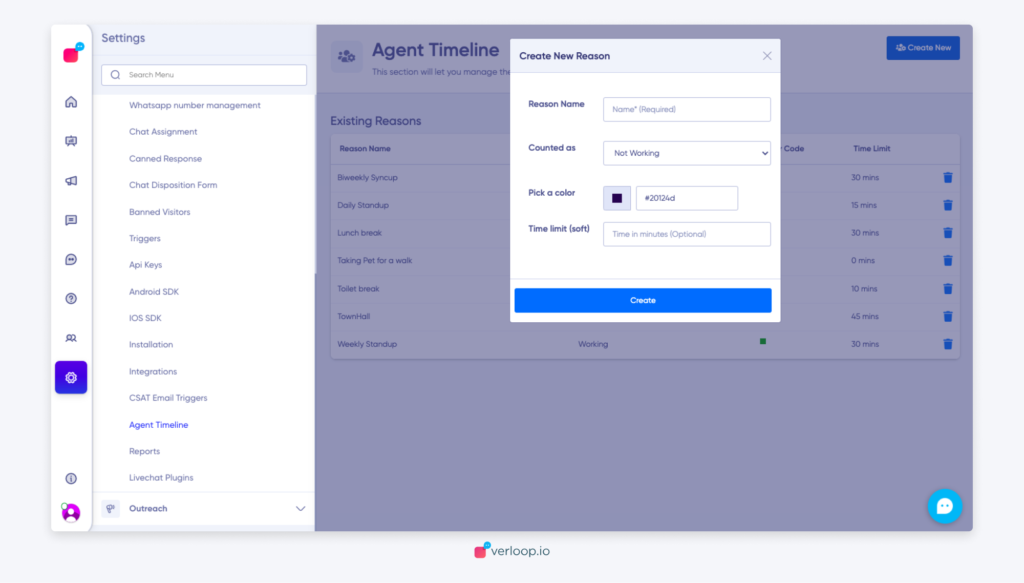
- You’ll have to fill up 4 fields:
- Reason name: the name of the status.
- Counted as: If the agent selects this status, will it be counted as working or not working?
- Pick a color: You can colour-code the status. It appears in the timeline with that colour.
- Time limit (optional): What’s the maximum time an agent can spend on this status.
- Click on Save and the status will be added to the list of existing reasons.
How does the calculation work?
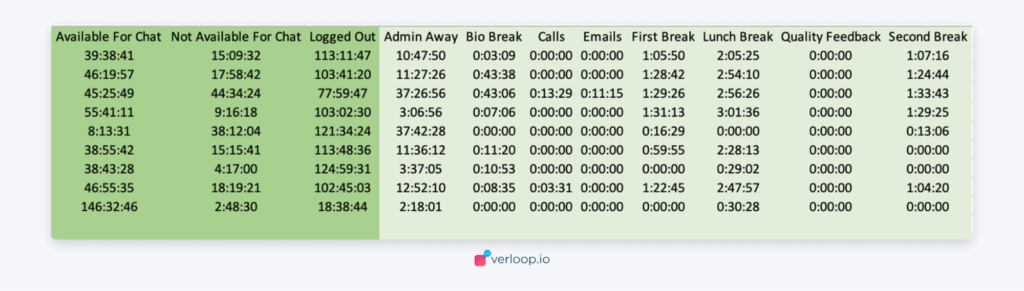
In a 24-hour time frame, the agent timeline considers working + not working + logged out status. In case reasons were stated for unavailability for chat, we split the duration aggregate per the reason mentioned
- Available for a chat – time duration when the agent is logged in and accepting chats.
- Unavailable for a chat – time duration when the agent is logged in and not accepting chats. Please note that this agent state excludes logged-out time.
- An agent can be logged in but working on some tasks other than chat, eg. training, onboarding, etc. Technically he is still working at the job but not on chat.
- In such scenarios, they become unavailable for chats stating one of the available reasons. Hence the reasons for being not available for chat are bucketed into working/not working.
Agent report
The same data, as shown above, can be seen in the report for any date range for each agent. This makes this data not only for visibility but also turns it into actionable data points. Read more about Agent Report.