Outreach allows you to streamline your messages as timely campaigns and establish quicker touchpoints with your audience directly from Verloop.io.
We support Outreach through the WhatsApp channel via which clients can reach out to their customers via campaigns/outbound messages. Once a customer responds to the outbound message we can engage with him using Verloop.io’s WhatsApp bot.
Looking for specific information? Click the link below to jump directly to that section
- How to create an Outreach?
- Via Excel
- Via API
- Define the Message
- How to create new templates?
- Enabling WhatsApp buttons (Optional)
- Storing customer responses as variables (optional)
- Choosing Audience (Only available if you selected the trigger type Via Excel)
- Choosing the end action
- Scheduling the campaign (Only available if you selected the trigger type Via Excel)
- Outreach Dashboard
How to create an Outreach?
- Click on + New Outreach in the top right corner.
- In the Details section
a. Enter the name of your campaign
b. Enter tags which might help you with search and analytics in the future

- Choose how you want to trigger your campaign for your customer.
Via Excel
- Trigger your WhatsApp campaign using an Xls document.
- In this use case, the user presets when to send the campaign and provides the list of recipients and respective placeholder/variable values in the message body.
- Verloop.io automatically triggers the campaigns row-wise at the user’s set time using the excel file provided.
- You may not need the help of your development team.
Examples:
- Sending out subscription reminders to a predetermined set of customers.
- Sending out payment plans or product info to a list of leads that is updated at regular intervals.
Via API
- Trigger your WhatsApp campaign using an API at your will.
- Variables like campaign id, recipient phone number, name, content specific variables in your campaign are all handled using the API.
- API-based triggers are helpful when you have a dynamic list of recipients and respective information to be sent whenever the sender feels the necessity.
- You may need the help of your development team
Examples:
- Sending out messages to customers after a successful purchase
- Sending out messages to customers for subscription renewal reminders
- Sending out general information like new features or new offer alerts (not promotional)
- Sending out shipment information/tracking details of a purchased product
Define the Message
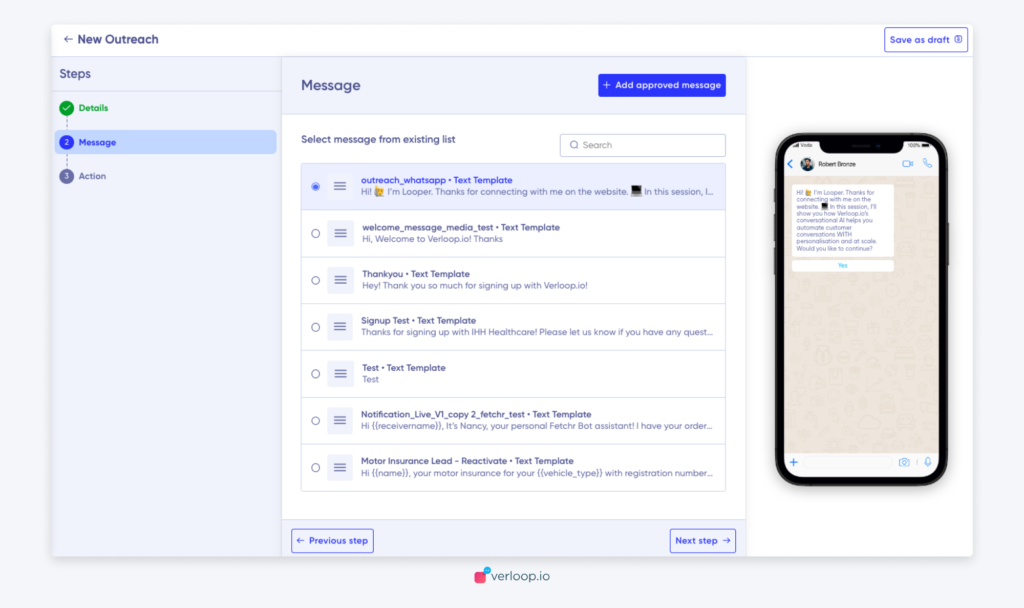
To create a new message click the New Message button. You can also use an existing/approved template by selecting messages from the existing list.
How to create new templates?
- Click on ‘+ Add Approved Messages’.
- Under Message, add a template name.
- Add your WhatsApp Template ID.
- Select your preferred language.
- Under Template Type, select the format in which you want to show your messages, such as text, image or document.
- Type in the Template message that you want to display in your campaign.
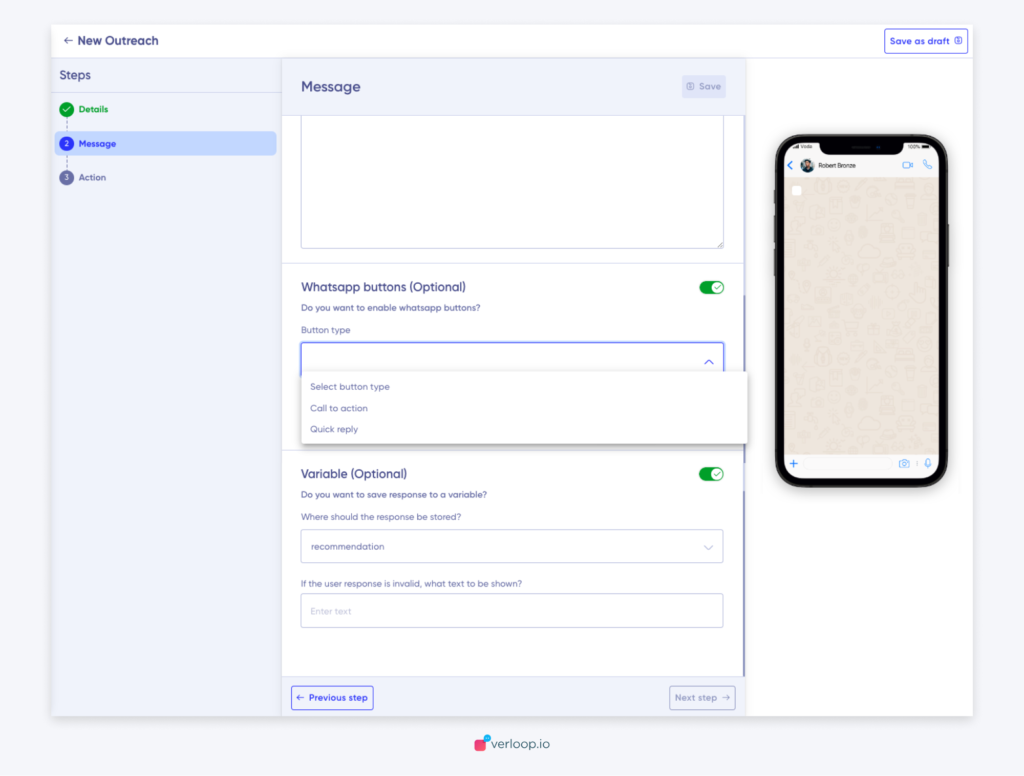
Enabling WhatsApp buttons (Optional)
- There are 2 types of buttons: Call to action and Quick reply
- WhatsApp allows a maximum of 2 buttons for Call to action and 3 buttons for Quick reply
- Call to action
- You can choose between 2 types:- Call phone number and Visit website
- In the Call phone number button, you need to add a name for the button and enter the phone number you want your users to call.
- In the Visit website button, you need to add a name for the button and enter the URL you want your users to go to.
- Quick reply
- You can add up to 3 buttons under this option.
- Add the button names you want your users to see.
- You can store these responses as variables (in the next section).
- Call to action
Storing customer responses as variables (optional)
- You can store customers’ responses from WhatsApp buttons as variables.
- Enable the toggle against Variable (Optional).
- Under ‘Where should the response be stored?’, click on the drop-down to see the various options available.
- Select the variable in which you want to store these responses based on the context.
- As a next step, enter the text that you want to show if the user response is invalid. You can customise this message to meet your brand guidelines.
- Click the Save button in the top right corner.
- Click Next Step on the bottom right to move forward.
Note: You can personalise the campaigns using variable parameters such as Name, Email and Phone number.
Choosing Audience (Only available if you selected the trigger type Via Excel)
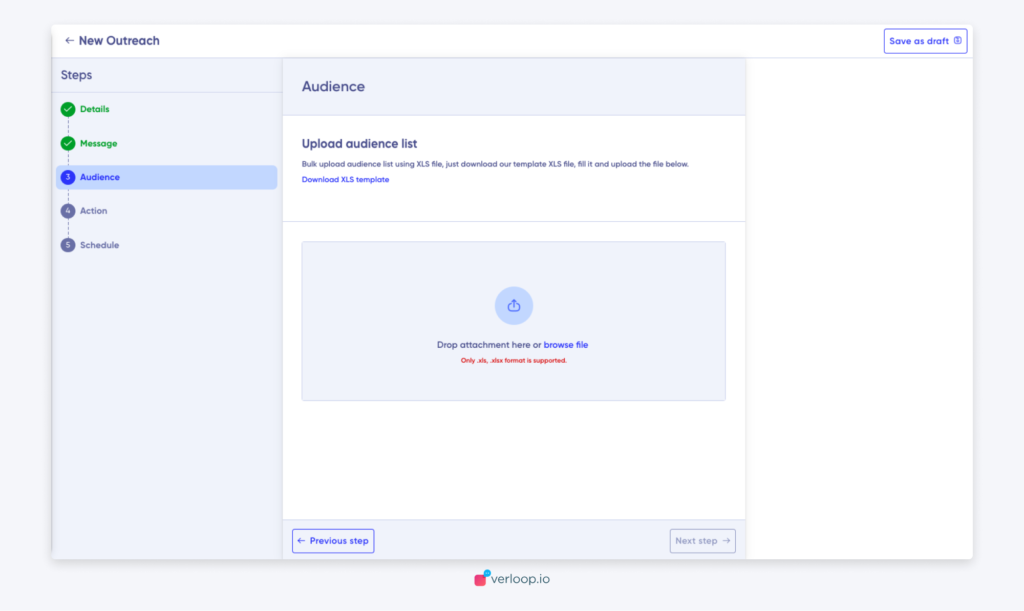
- You can choose an audience either from an existing list or upload a new one in just a few seconds.
Uploading a new list of users
- Under Audience, click New upload list.
- You can bulk upload an audience list using an XLS file. All you have to do is download our template (XLS file), fill in the details and upload the file in the space provided.
- Click Upload.
- As your list uploads, you will be able to see the status of the upload against every user name.
These are the following statuses you might come across:
- Pending – This means your contact uploading is underway.
- Duplicate User – This means that the contact that you’re trying to upload already exists multiple times in the same list.
- Error Uploading –
- Success – This means that your contact has been uploaded successfully.
- You can also choose to Retry upload if you wish to.
- Click Confirm Upload to move on to the next step.
- Under the Name of the list, enter the name of the audience list. Eg: Winter-Sale-Offer
- Click Done.
Choosing the end action
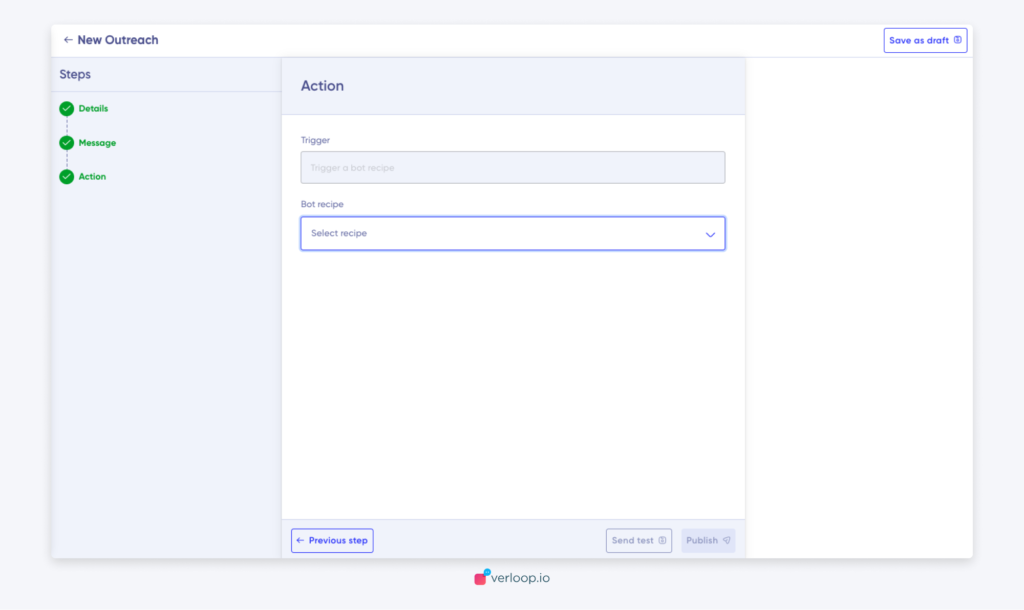
In this step, once the end-user interacts with your campaign, you can immediately trigger the next step to drive your user to take an action.
- Head to Action.
- Under Action, click Bot Recipe if you want the conversation to progress according to the recipe you already have in place. For this, Under Bot recipe, select the dropdown to choose the recipe that best works for your campaign.
- Before publishing the campaign, you can also test it by sending it to your test contacts. Review the message in the campaign once again and hit Test.
- Set Live.
Scheduling the campaign (Only available if you selected the trigger type Via Excel)
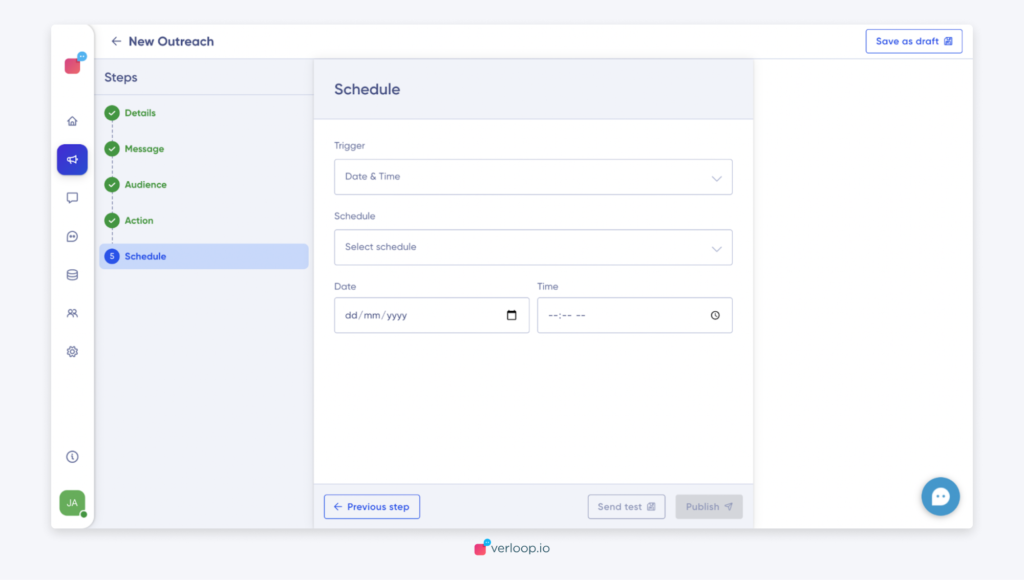
- Schedule the trigger by inserting the date and time.
- Frequency: Set the frequency at which you want the campaign to occur, Eg: once, recurring
- After adding the details, click Publish.
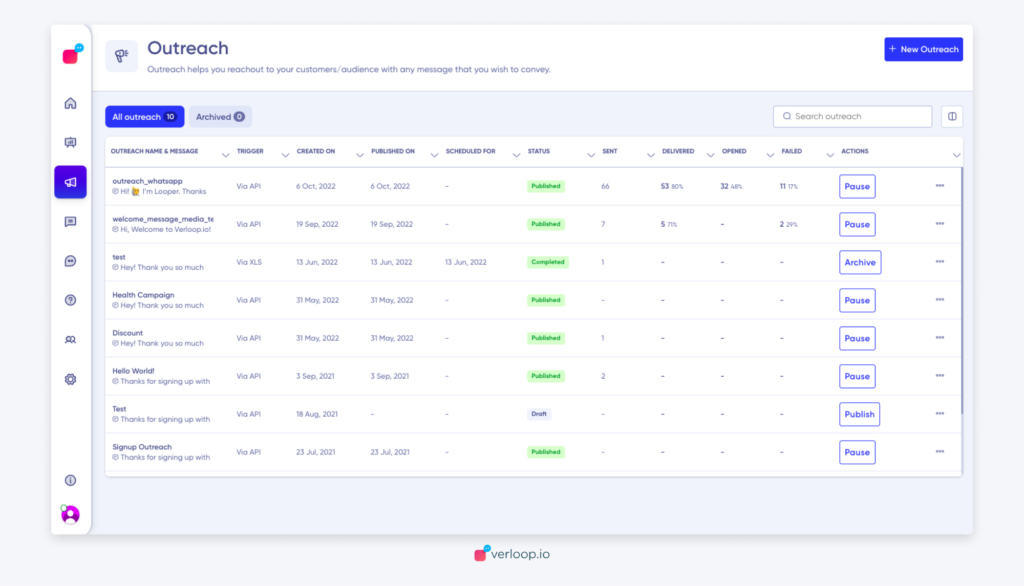
Outreach Dashboard
In this section, you can track the performance of your campaigns. The metrics you can track include
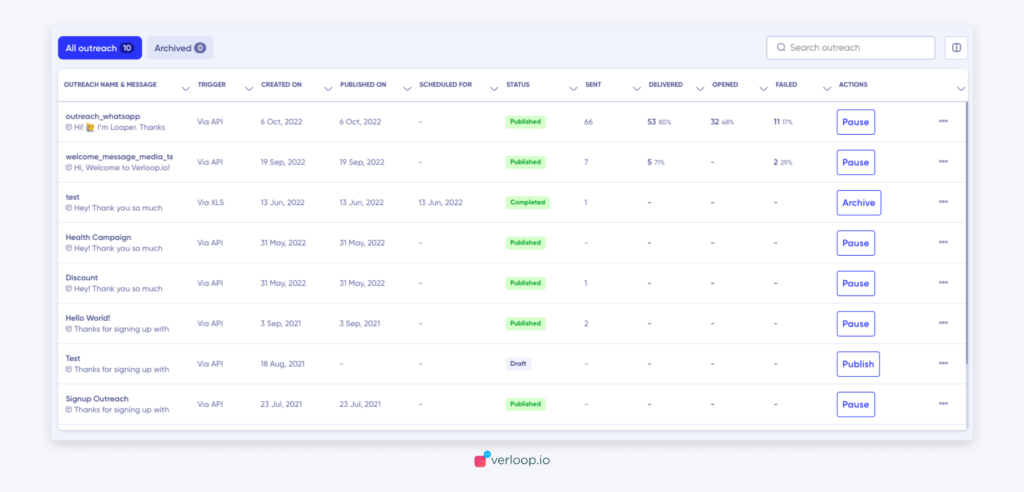
- Outreach name and message
- Trigger
- Created on
- Published on
- Scheduled for
- Status
- Number of Messages Sent
- Number of Messages Delivered
- Number of Messages Opened
- Total delivery failure
How to check the status of a specific campaign?
- Head to Outreach
- On the Dashboard, under Status, check for anyone of the following:
- Active – The campaign is live and running. To pause the campaign, click Pause under Actions.
- Paused – The campaign was once live and is now paused. To make the campaign live, click Resume under Actions.
- Draft – The campaign was created but has never been live yet. To make the campaign live, click Publish under Actions.
- Completed – The campaign has been launched and ended successfully.
How to navigate through your Outreach Dashboard?
- Search Filter: You can search for your campaigns by Name or message body itself.
- Archived Tab: List of all the campaigns which have been archived.
- View campaign details like name, id, template name, id, published dates or scheduled dates etc.
- Choose which columns to appear in your dashboard.