With Verloop.io, your agents can actively engage with your users and potential customers through the live chat function, making the support process more natural and conversational.
The agents get to see all chats across all channels in one place. Agents can use various features available to them here to close the chat quickly and accurately.
Looking for specific information? Click the link below to jump directly to that section
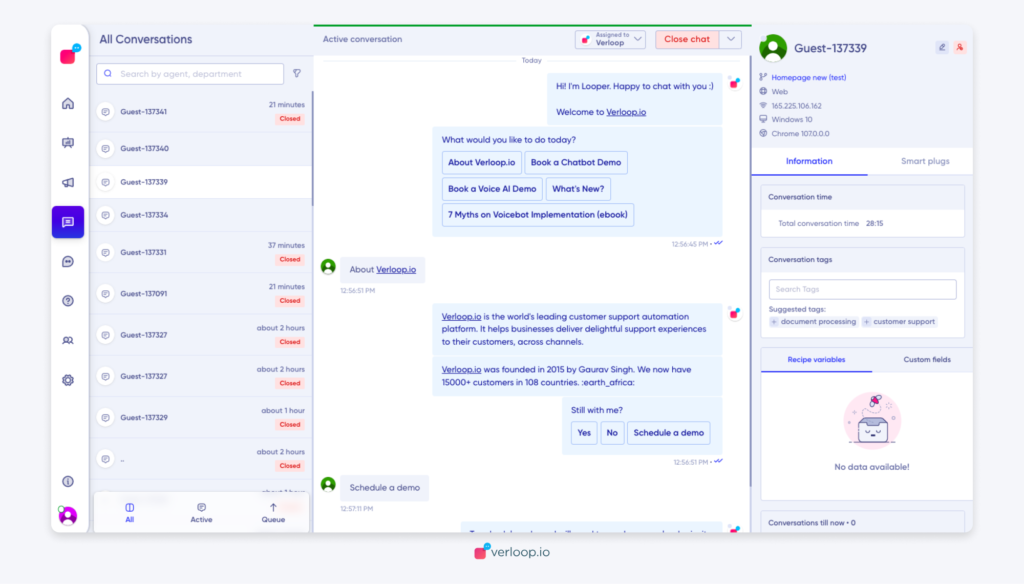
The Live Chat function is divided into three sections:
- The left side panel shows all the chats and stages of these chats
- The middle panel shows the details of a selected chat
- The right side panel shows the user details and smart plugins
Left side panel
On the left section of the screen, you can see all the chats that your customers are having with you.
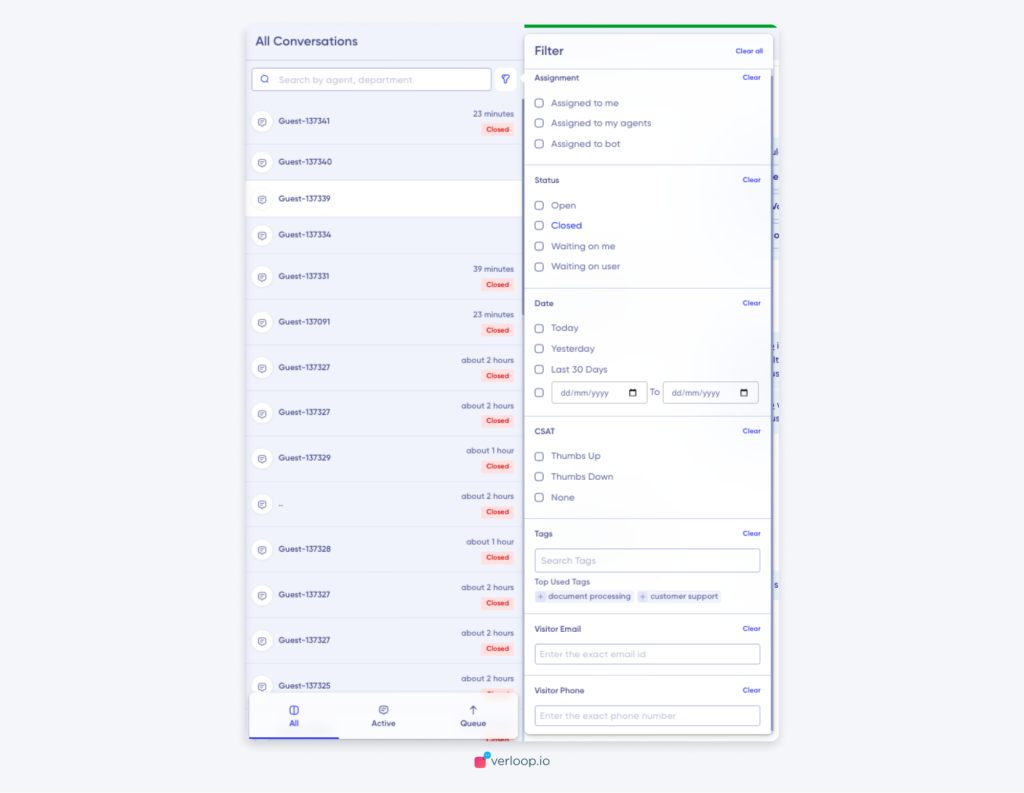
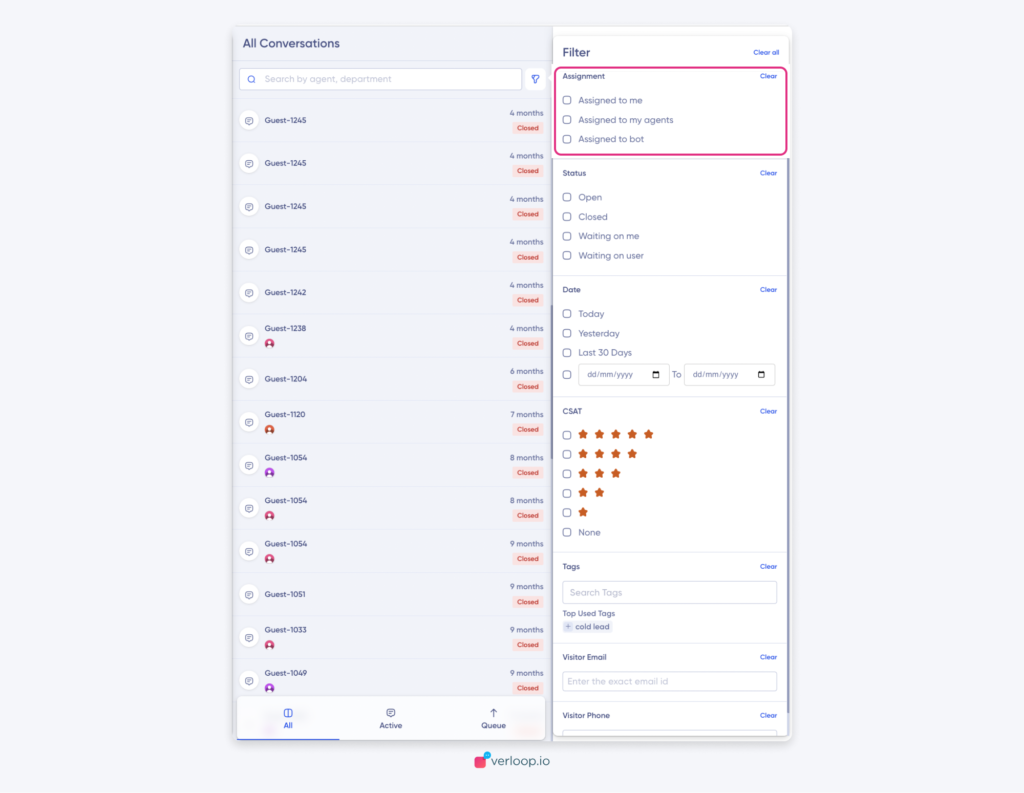
On top of the panel, you can see a search bar and a filter icon. With these features, you can easily discover chats.
- Search bar: allows you to search for a chat based on agent name or department.
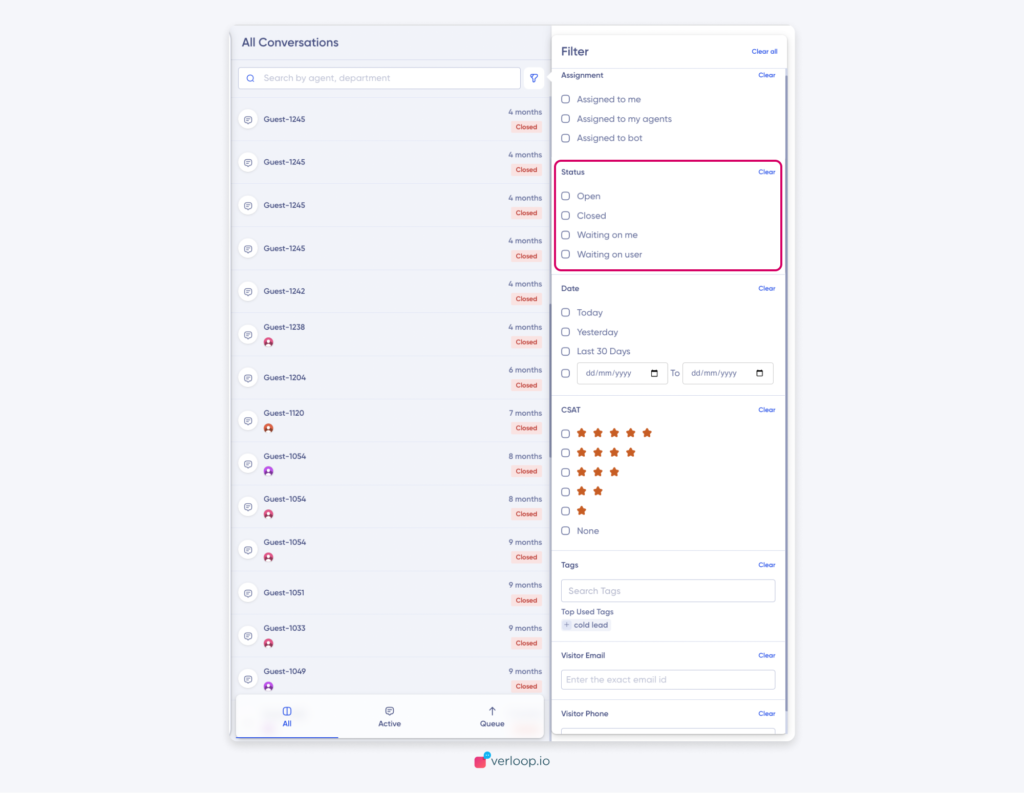
- Filter: allows you to narrow down your search based on the following parameters
- Assignment
- Assigned to me
- Assigned to my agent
- Assigned to bot
- Status
- Open
- Closed
- Waiting on me
- Waiting on user
- Date
- Today
- Yesterday
- Last 30 Days
- Customer range
- CSAT
- Thumbs Up
- Thumbs Down
- None
- Tags
- Visitor email
- Visitor phone number
- Assignment
Stages of a chat
Clients can separate their chats based on to whom it’s assigned:
- Assigned to me
Chats that are assigned to the active agent of the Verloop.io platform.
- Assigned to my agent
This will be visible to the Admin/Manager who can see all the chats assigned to their agents.
- Assigned to bot
This will show the chats which are currently being handled by the bot.
Status of a chat
A chat in the Queue or Assigned to some agent can be put under 4 statuses:
- Open
An active conversation from both ends is considered an open chat. This is the default state of a chat.
Open status applies to a conversation which happens with an AGENT/BOT
If a chat under Waiting on me/Waiting on user receives any message from the visitor or sends any message to the visitor, it will by default move to Open status.
- Closed
This marks the close of a conversation. NO messages shall be received or sent through a chat room after it is marked closed. Only a CSAT score for the same chat can be received from visitors after this.
Closed status applies to a conversation which happens with an AGENT/BOT.
- Waiting on me
If the agent is busy and they need time to come back to a customer request, they can mark it for later and revisit it instead of leaving it in the open chats (active) section.
The waiting on me status applies to conversation which happens with an AGENT only.
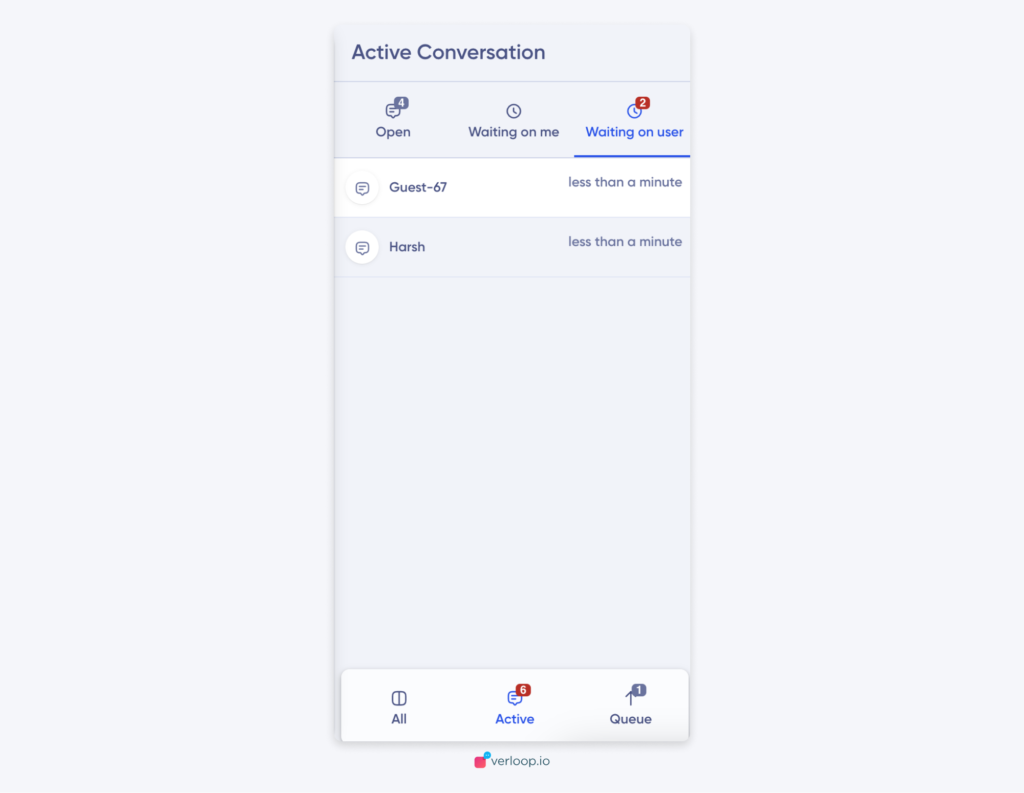
- Waiting on user
If the visitor is not replying to the agent, the agent might want to opt for another chat and go back to the former visitor whenever they respond back. In this case, Waiting on user can help the agent bucket chats smartly.
Waiting on user status applies to conversation which happens with an AGENT only.
As soon as a message is sent/received on a conversation with the status “Waiting on user“, it automatically changes to an open chat.
A timer and custom closing message can be configured for the chats which stay inactive under this status. Under such circumstances, the system closes the conversation and all the respective performance attributes will be attached to the bot. In such cases, resolution time excludes the system timer set by the admin.
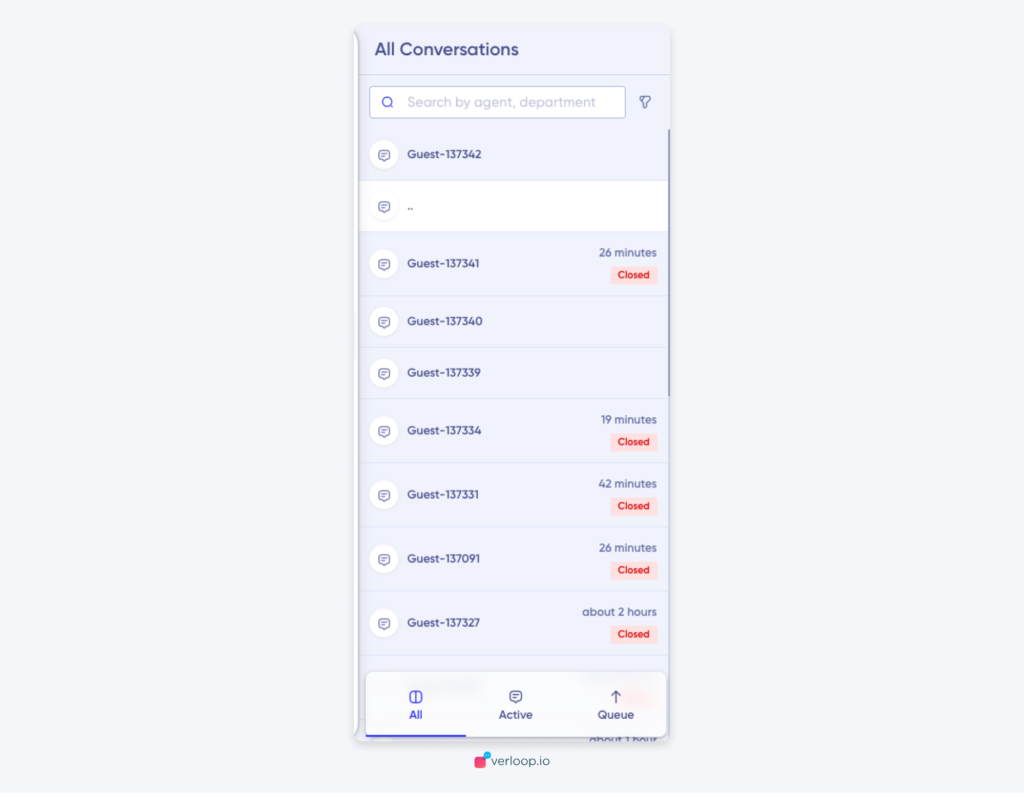
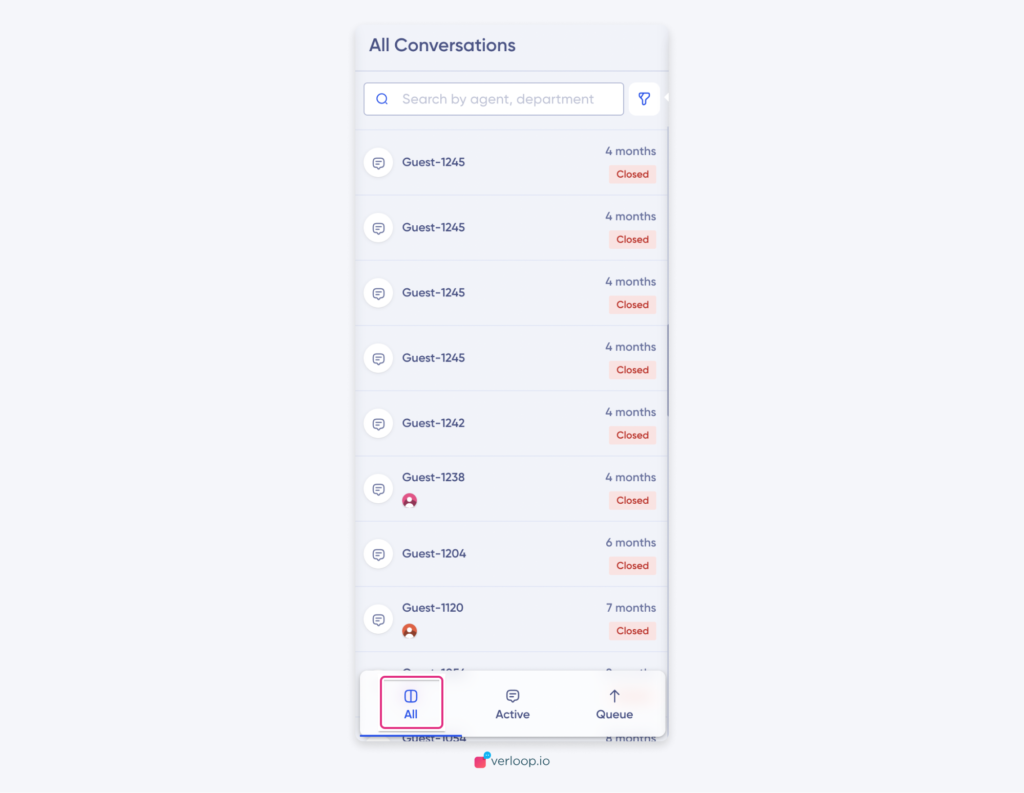
At the bottom of the panel, the chats are further divided into
- All: You can see a historical list of all chats with the chat status, including open, closed, waiting on user, and waiting on me.
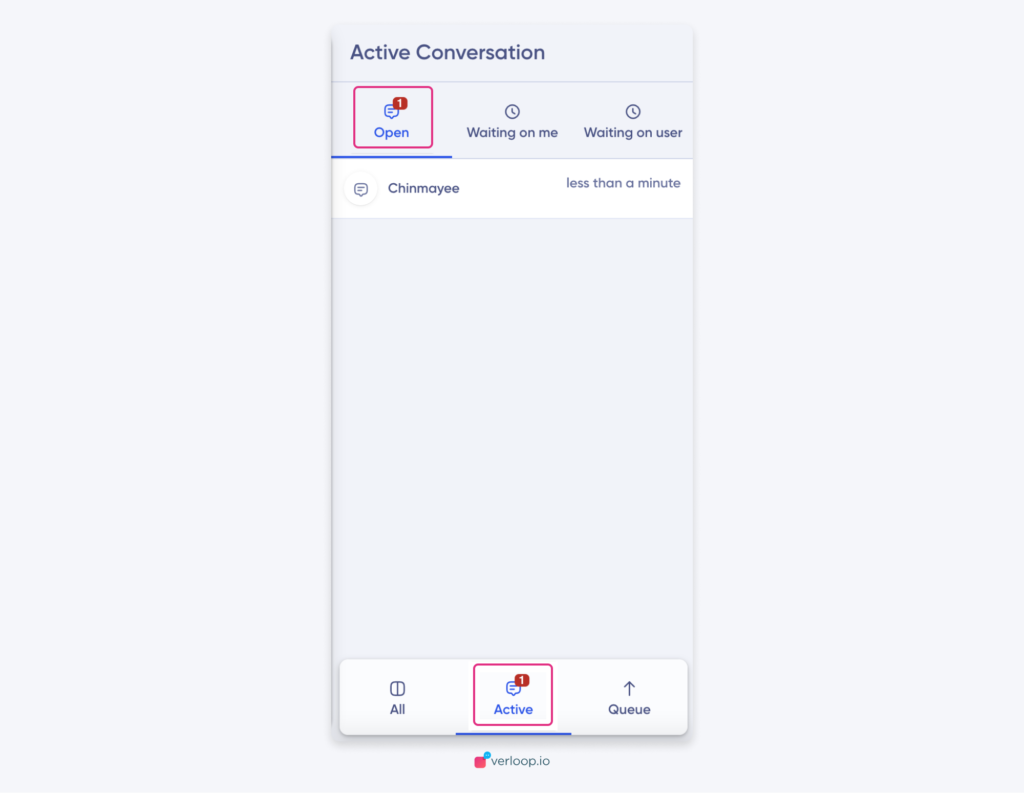
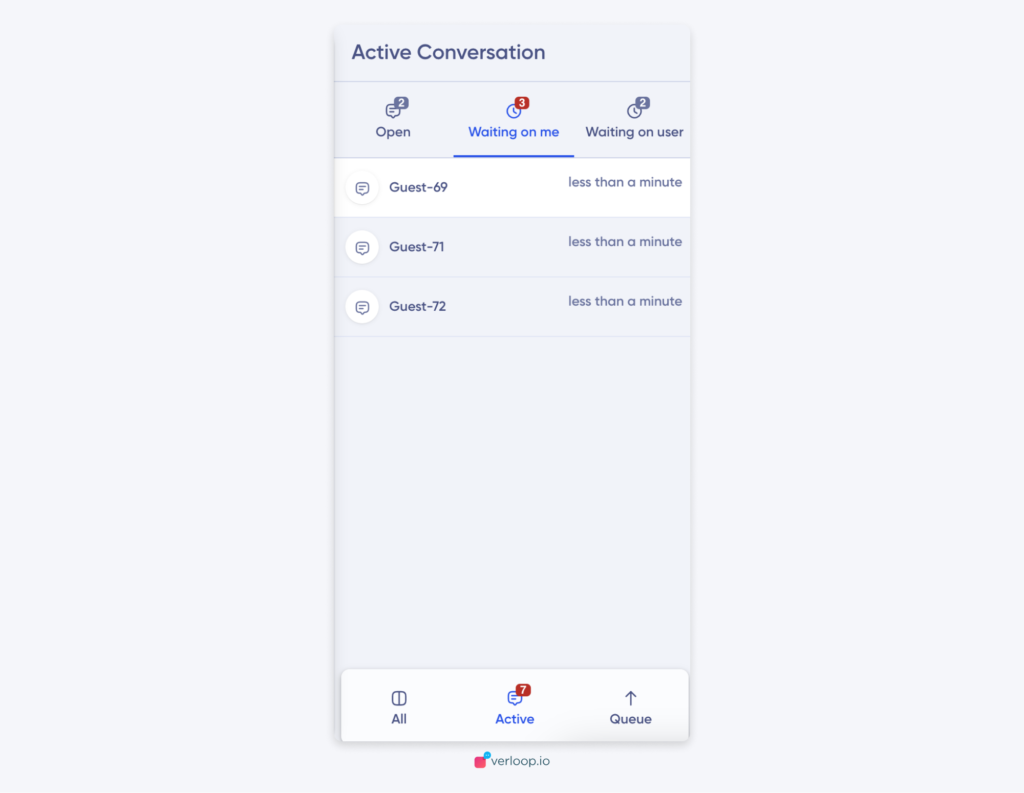
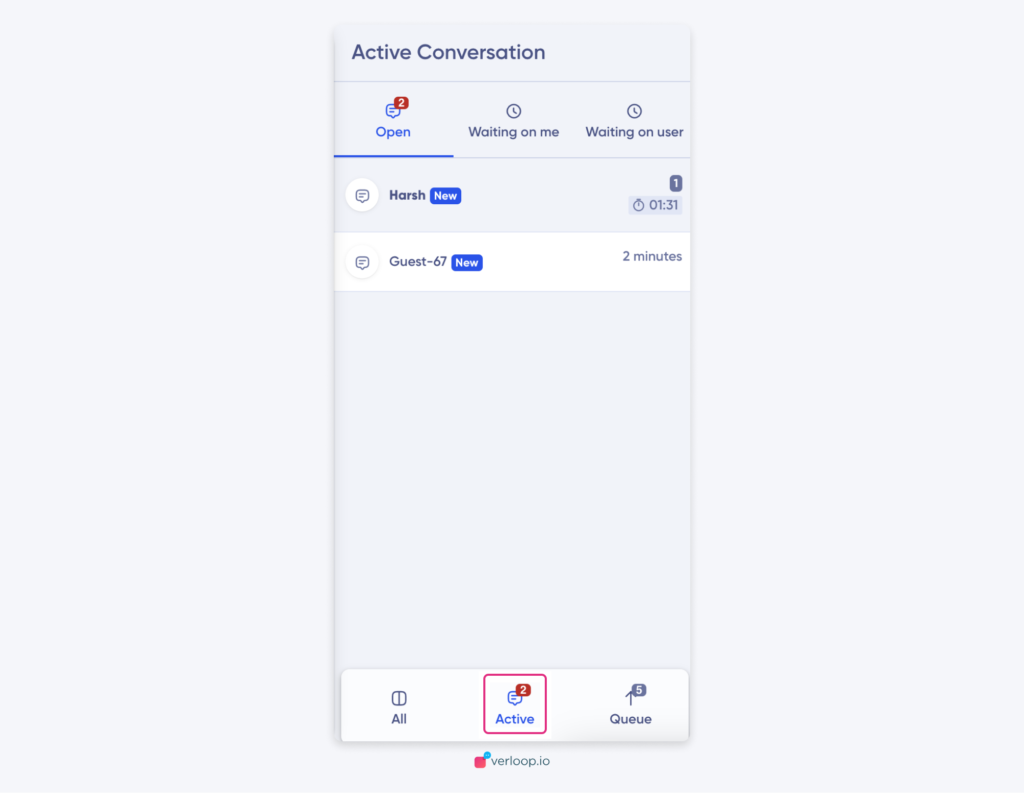
- Active: You can only see ongoing chats here, i.e. open, waiting on user, and waiting on me. Along with this, you can see the following information
- The number of active chats (allocated to you)
- Visitor name
- Time since the last message by the Agent or customer (depending on whom it is waiting on)
- Number of unanswered messages from your customer (if it’s waiting on me)
- Queue: By clicking on this icon, the user can see a list of all chats which are currently in the queue. A chat is put in a queue when the end user requests a transfer to an agent.

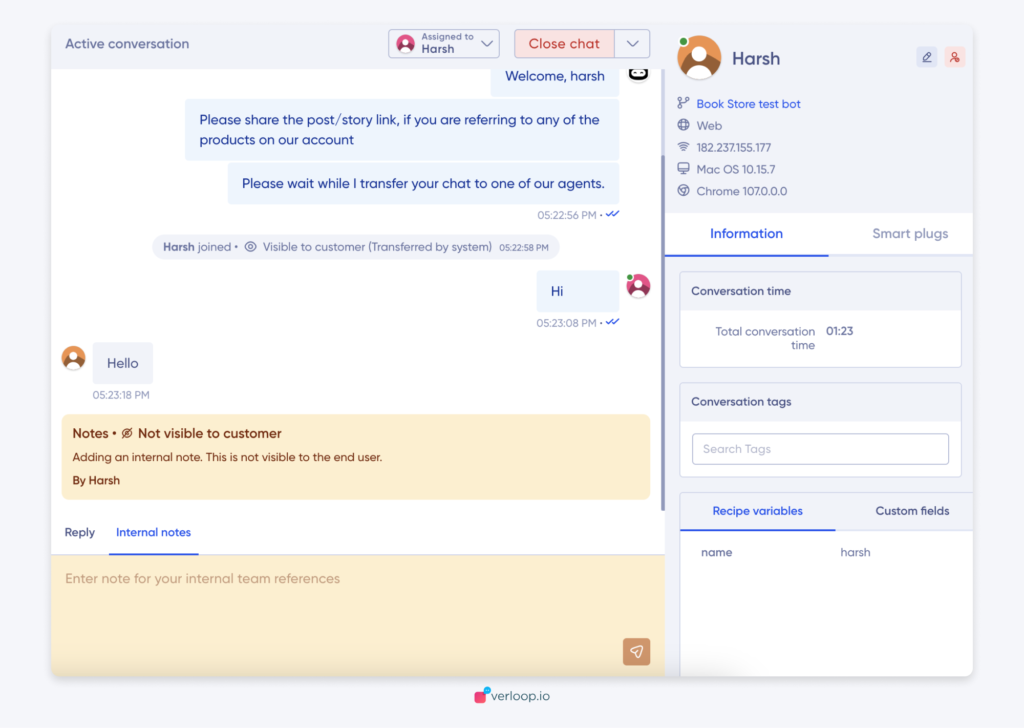
Centre panel
In the centre section of the screen, you can see the conversation of any particular chat. Once you click on any chat on the left side panel, the centre panel opens up. You will be able to find the following information here.
- Status: If the chat is active or closed
- Assignment: To Whom is the chat assigned? By clicking on it, you will be able to transfer the chat to an agent/department.
- Change the status of a chat to closed, waiting on user, waiting on me. Note: this functionality is not available once the chat is closed.
- Past chats: historical chats in case of a repeat customer
- Conversations happening between your customer and your bot/agent
- Reply box: through which your agents can reply to your customers, access canned responses, attach files (we support pdf, audio, video and image formats), and use emojis.
- Internal notes: allows you to write important messages other handlers of the chat should know for future reference.
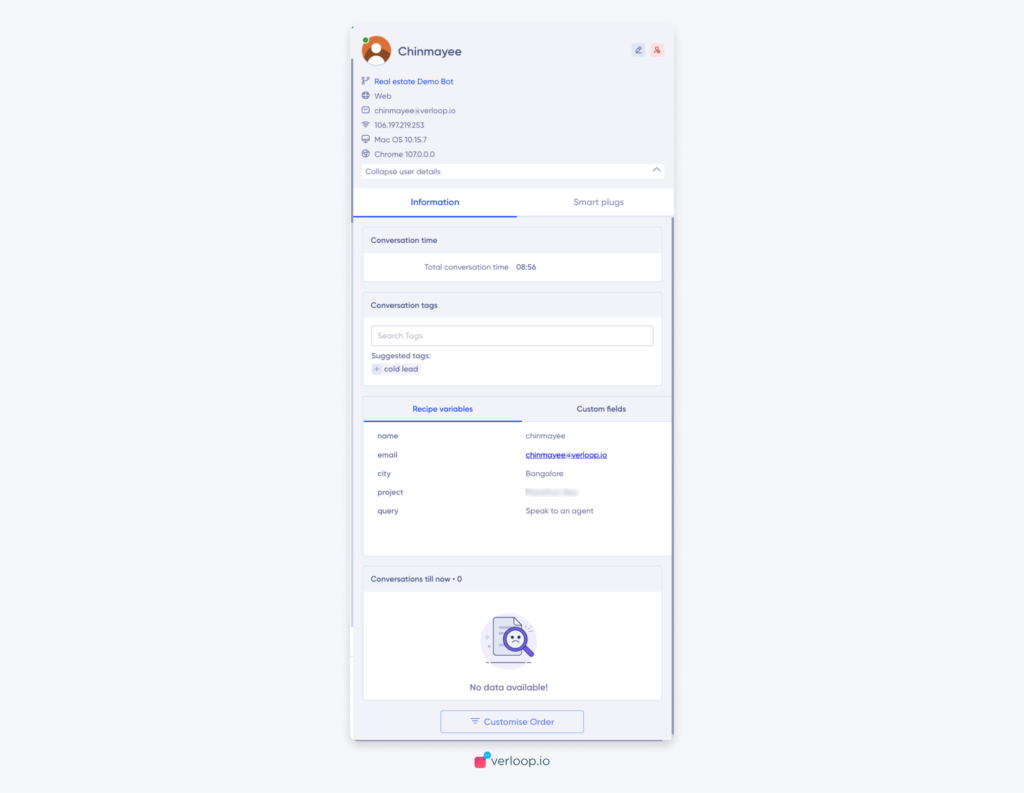
Right side panel
Also referred to as the information panel, you can see information on your customers, plugin tags and chat history. This section of the live chat helps you with the following information
- Visitor’s availability: if the visitor is online or not
- Recipe name: from which recipe is the visitor chatting
- Visitor’s browser details: details on visitor’s IP
- Edit visitor details
- Block visitor: you can block a user (only works for App/Web users; not applicable for WhatsApp, Instagram, or Facebook)
- Chat information
- Conversation time
- Conversation start time: the exact time when the chat was initiated
- Conversation duration: time duration that has passed since the chat was initiated
- Conversation tags: agents can add tags here. We also suggest tags based on conversations
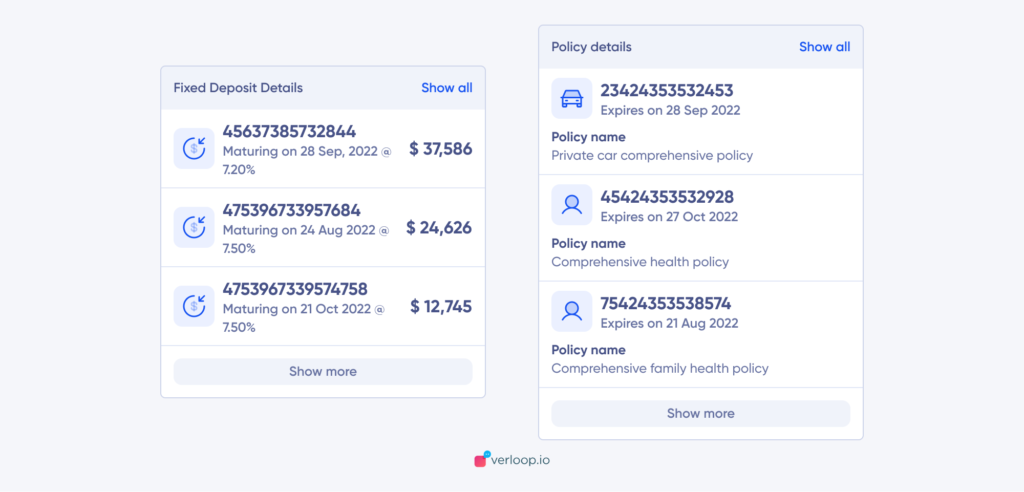
- Recipe variables: information collected during a conversation
- Custom fields: see information from your integrated databases
- Conversations till now: all the chats your user has had with you in the past
- Conversation time
- Smart plugs: Pull or push information through API
Smart plugins
The live chat plugin will help you integrate our dashboard with your system, CRM or any other third-party application thereby enabling you to push or fetch data in a pre-configured way.
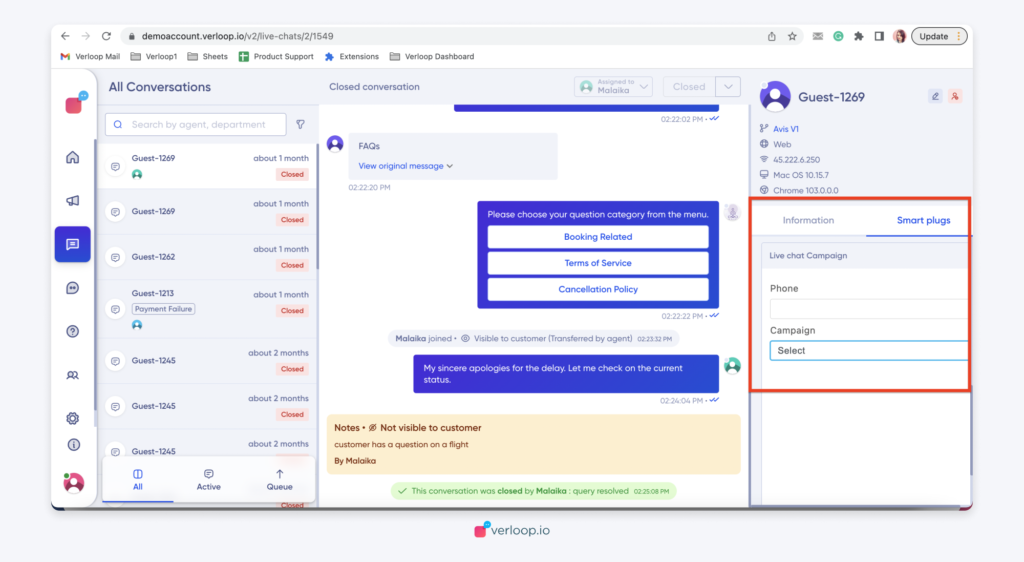
When a conversation is picked, the enabled live chat plugins will load up in the selected Department’s RHS pane of the chat UI of Verloop Dashboard.
A live chat plugin can be configured to show the contextual information of the current conversation to the Agent.