When a chat is closed the agent needs to summarise what was discussed in the chat. With Verloop.io’s chat disposition form, agents can add all the details right after the chat session.
The chat disposition form is created by admins and it enables agents to record every chat session’s outcome, without the hassle of note-taking or manual data sharing. By analyzing this data the business can better understand what queries end customers are asking and what are they most interested in when it comes to supporting or sales. This also helps analyse any underlying issues that might have gone unnoticed otherwise.
Steps for creating the form
First, let’s understand how you can create the form (only the admin has the access to create the form).
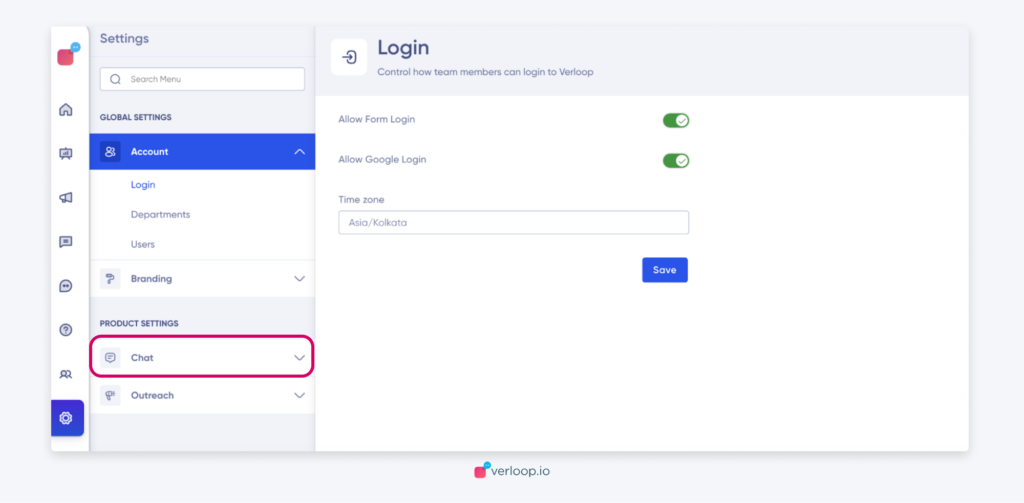
1.Go to settings on the Verloop.io dashboard.
2. Then click on the “Chat” option, from the “setting” list.
3. Once you click on “Chat”, go to the “Chat Disposition” link and click on it.
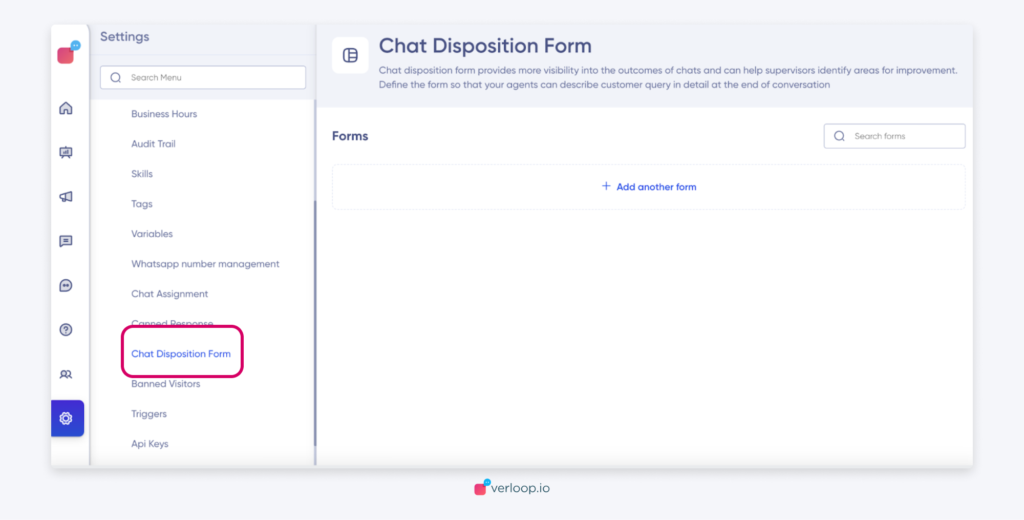
4. Post clicking on “Chat Disposition,” click on Add another Form.
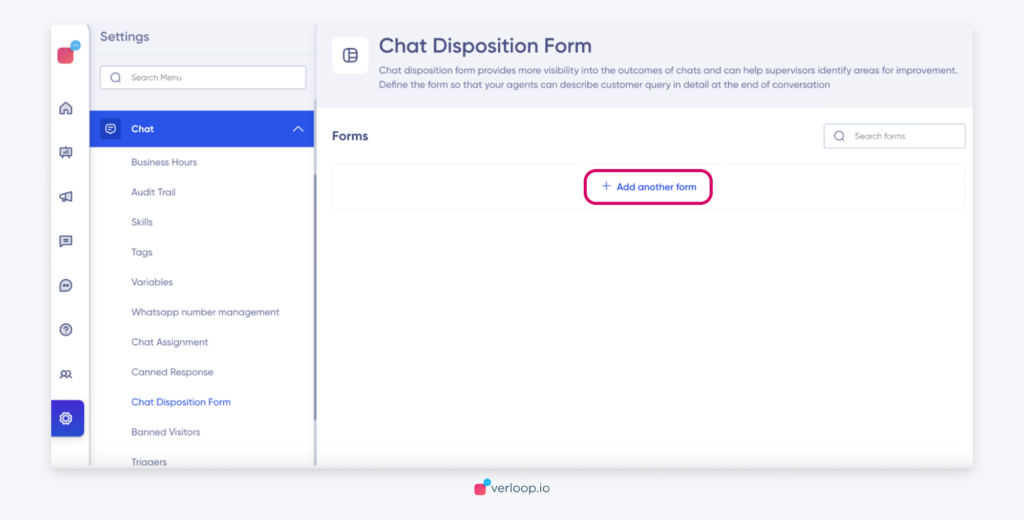
5. Add a name for the form in the placeholder which shows ‘Form 1’. Ensure it’s unique for easy recall.
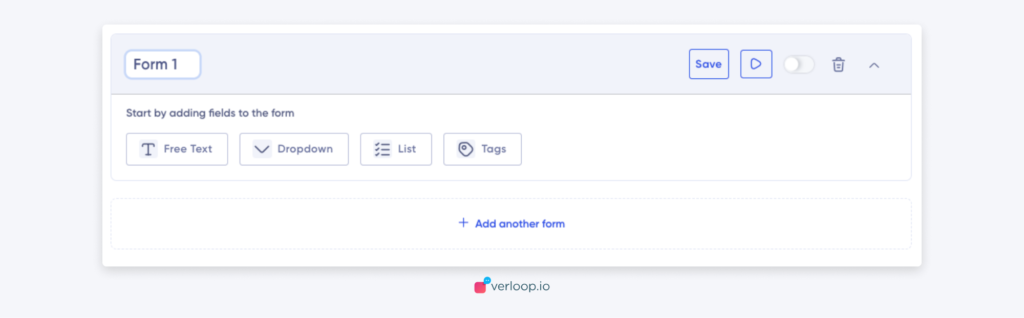
6. Admins can add 4 different types of fields. Fields are the type of questions you want in the form.
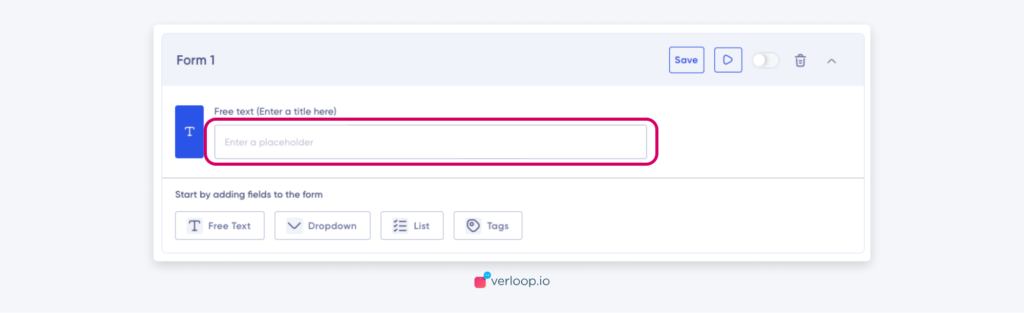
a. Free Text: Allows agents to freely type in answers in a message box

i. Admins can add their questions as the title
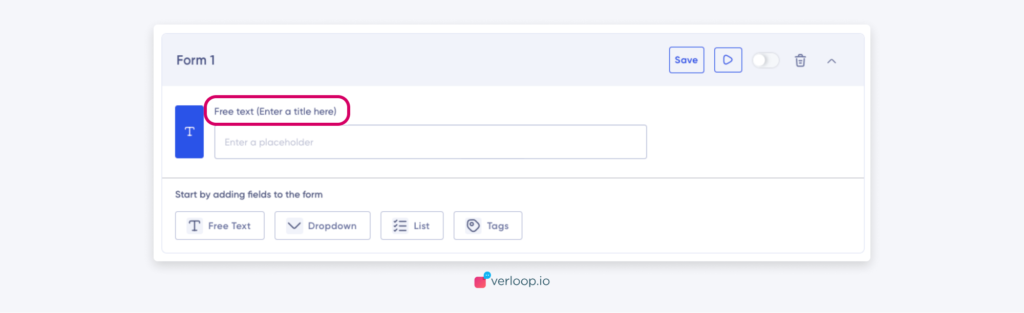
ii. If required, you can also add a placeholder answer to guide the agent. This text will be shown to the agent when they are filling out the form.
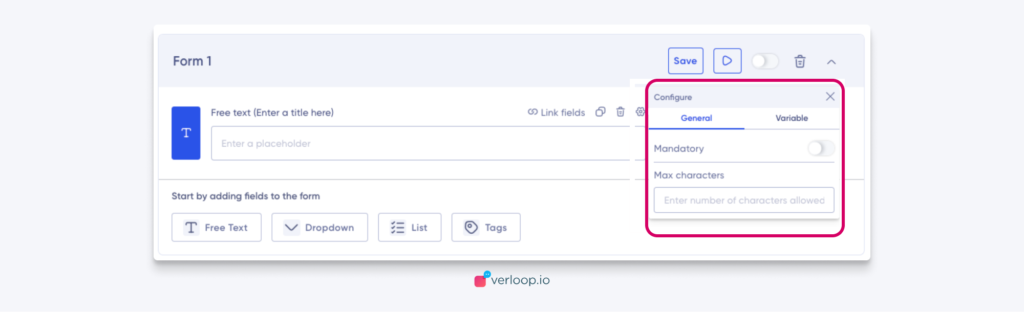
iii. You can set a maximum number of characters allowed in the answer field by clicking on the settings icon above the field
b. Dropdown: Allows agents to select an answer from a pre-defined drop-down list.
i. Admins can add their questions as the title
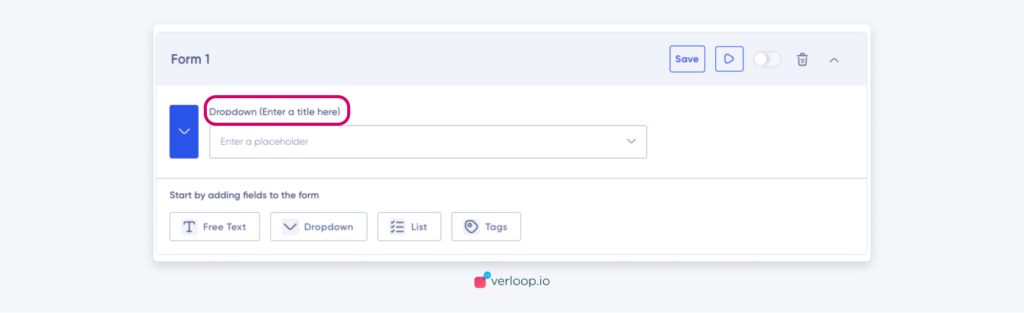
ii. If required, you can also add a placeholder answer to guide the agent. This text will be shown to the agent when they are filling out the form.
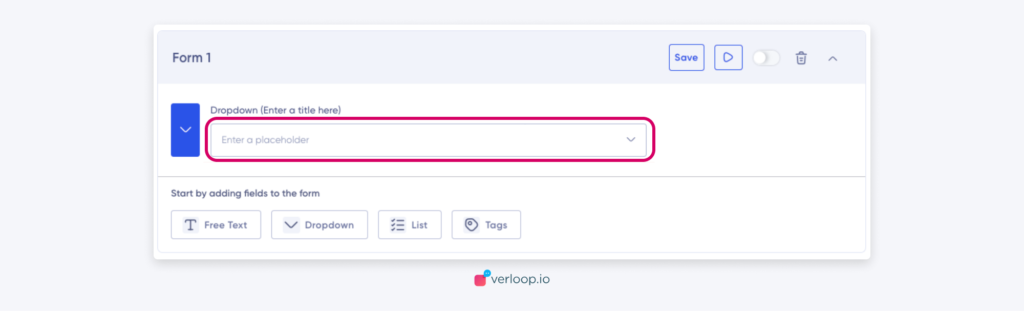
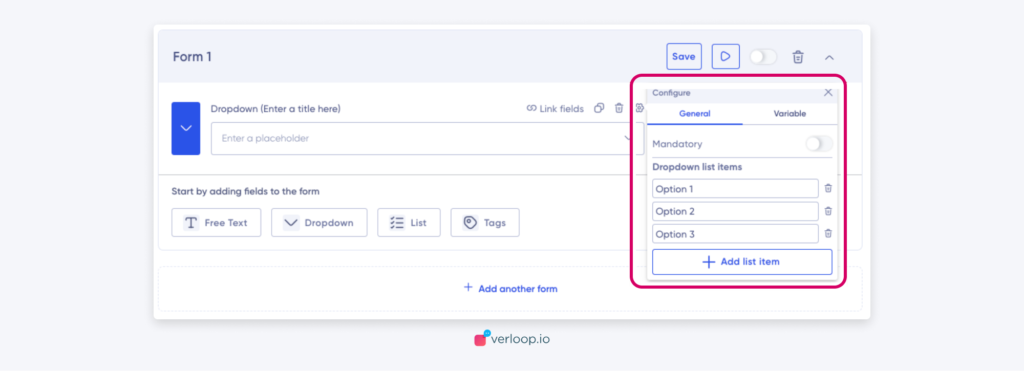
iii. Click on the settings icon above the field to add dropdown list items.
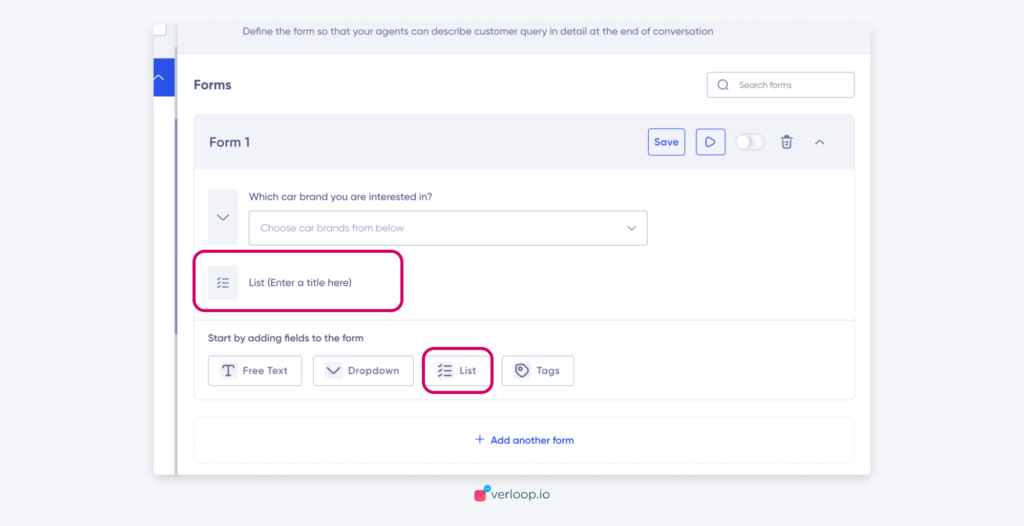
c. List: Allows agents to select multiple options from a list of options provided to them.
i. Add a title to the list.

ii. Click on the settings icon above the field to add the list of items. Admins can opt to make it single-select or multi-select.
d. Tags: Allows agents to attach tags to each chat.
i.Add a title to the Field.
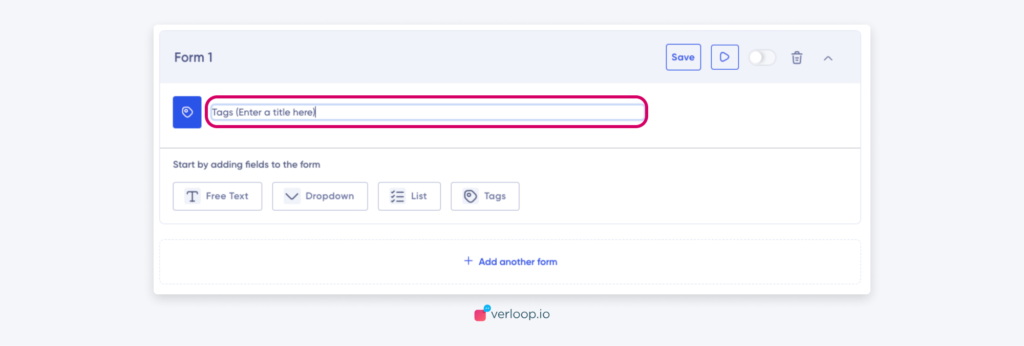
ii. Click on the settings icon above the field to add the list of tags.
Note 1: These fields (also called Labels) can be made mandatory if required. Please note, a form cannot be made mandatory, but specific fields in the form can be. To make a field mandatory, click on the settings icon above the field option and toggle the Mandatory switch on.

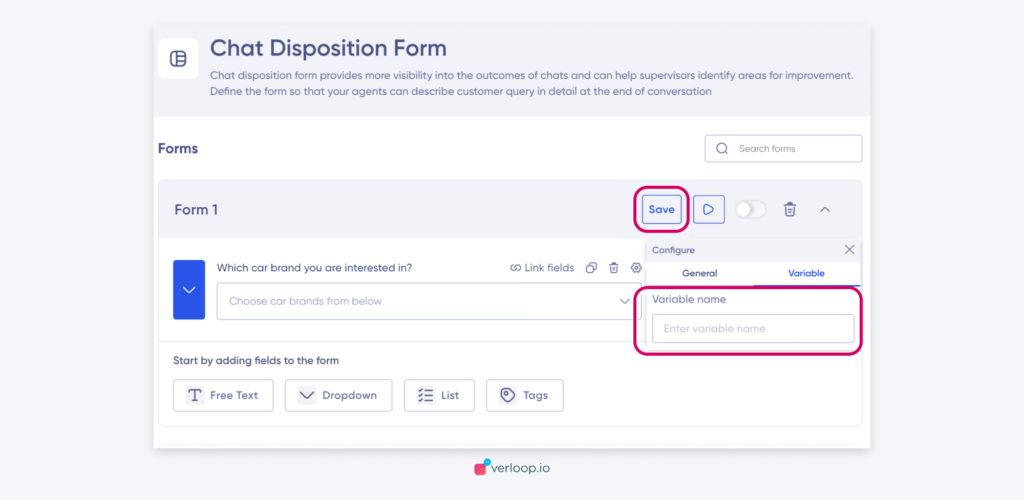
Note 2: You can save values as a custom variable, which can be accessed with chat closing API, reports, and RHS panel on the live chat. If you do not add the variable and save the form, the variable will be named as the given label name. You can overwrite it anytime you want.
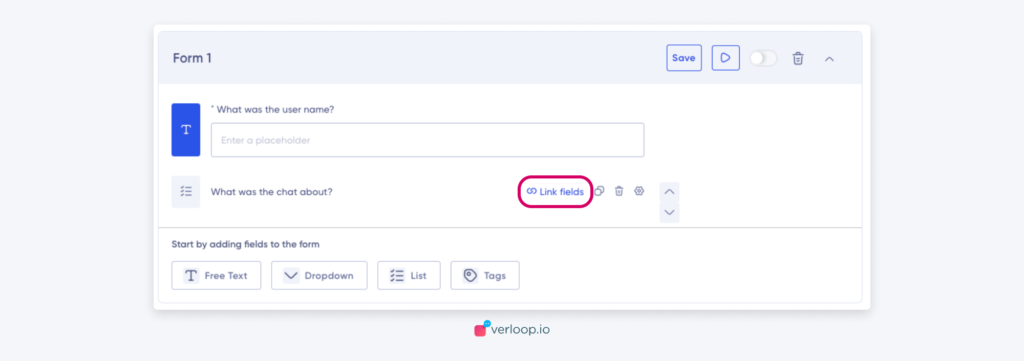
7. All these labels can be interlinked.
a. After you added the first field (parent label), click on the save button.

b. Select the next label (child label) that you want to link to the previous question (parent label). Here, for example, we have selected “List.” Add the list name. (The linking label must be added subsequently and not alternatively)
c. After adding the List, click on the link fields button.
d. Select the parent label, you want to link and then to save click on “Link selected fields.
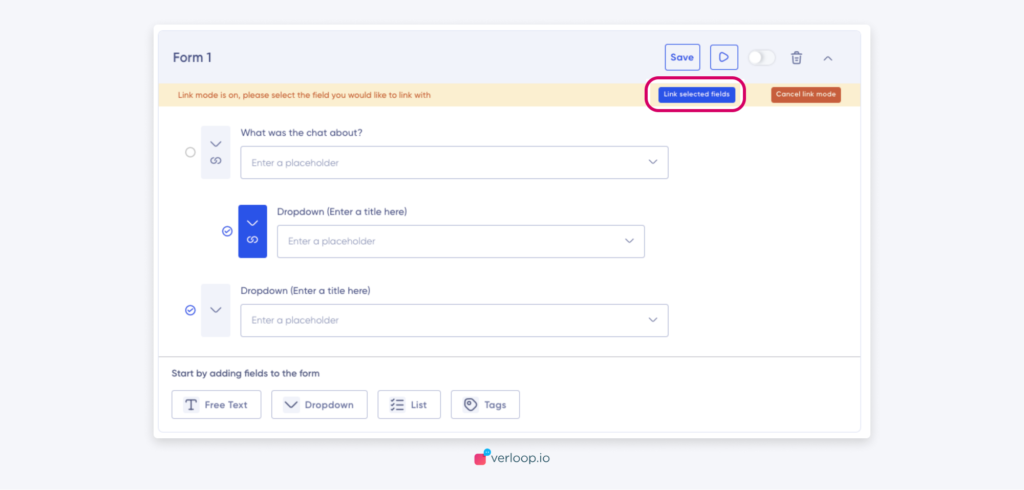
You can add multiple follow-up questions and link them to the previous question. Even link the sub-questions which are already linked with a label.
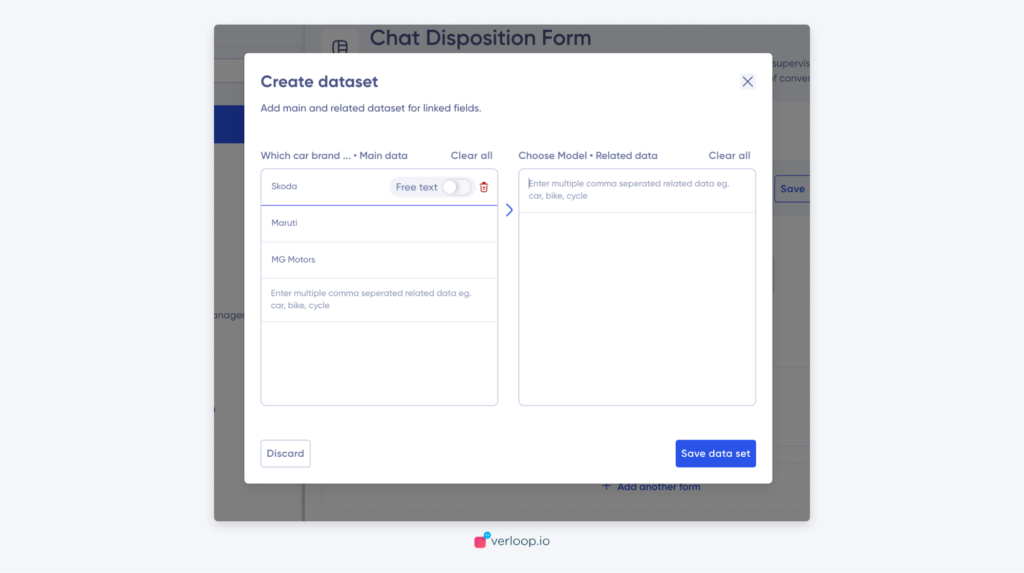
e. After the linking is done, hover over the parent label and you will see “Edit dataset”

f. By clicking on it, you will be redirected to the “Create dataset” dashboard
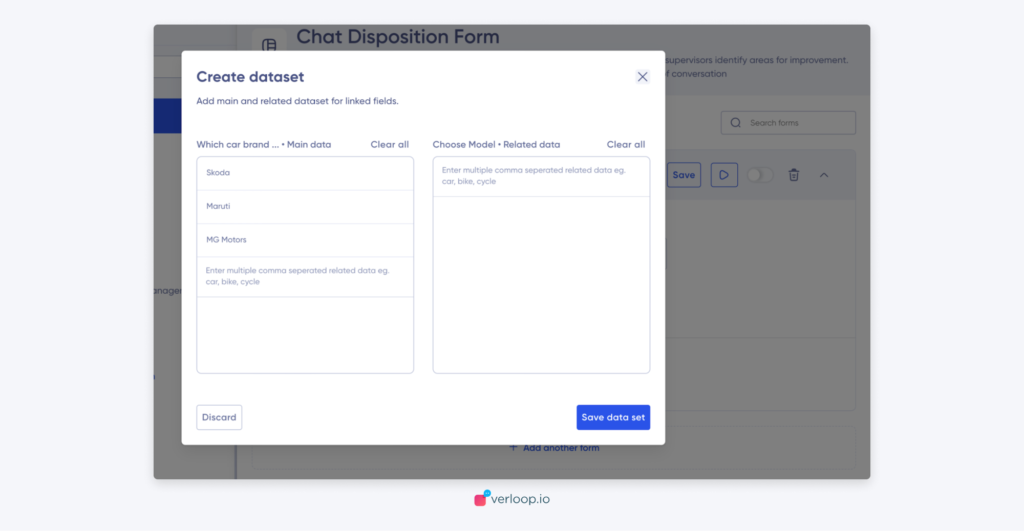
You can add more Main data in a single line by separating them with coma. And even delete any main data that you don’t need.
g. Click on any Main data to add its related data, again entered manually and separated by a comma.
Linking multiple fields under a label.
a. After you have created at least 2 labels, you will see the option to link them to another one. For example, we have 2 labels: Car brand and the Car model
b.Once you click on the link option against the Car model,
i.The option will be in a linking mode
ii. You can select the labels which you want to link
Note: the label which is at the top of the selected choices is treated as parent/main label in the pair.
- In this case, you can see only the Car brand
- As soon as this choice is confirmed, it will populate all the field values attached to the Car brand (e.g. Skoda, BMW, Ford etc. are field values of the Car brand).
- You can now see two options in the RHS child label table
- Choose from a dropdown/list/tags (depends on which label was chosen initially as a child field) or choose a free text
- If you choose dropdown/list/tags as a child label, you can add respective field values from which an agent can choose
- If you choose free text, when the value attached to the parent label is clicked, the agent is shown a text field to enter which is saved against the same custom variable of the child label
- Set the values for the Car brand in the RHS section which has to be shown when the agent selects one of the options (Skoda, BMW, Ford etc.) independently.
- This branching will continue making sure that no two labels have same starting point
NOTE: In case the user has already set values for the car model even before linking it, we inform the user that the values will be lost and the user will have to add them again.
Note: If you wish to unlink a label, the data will be lost.
8. After you have added the related elements/options, click on “Save data set.”
9. To see how your question will appear, you can click on the preview button.
You can then see the preview of the question.

10. Click on “Save to save the form.
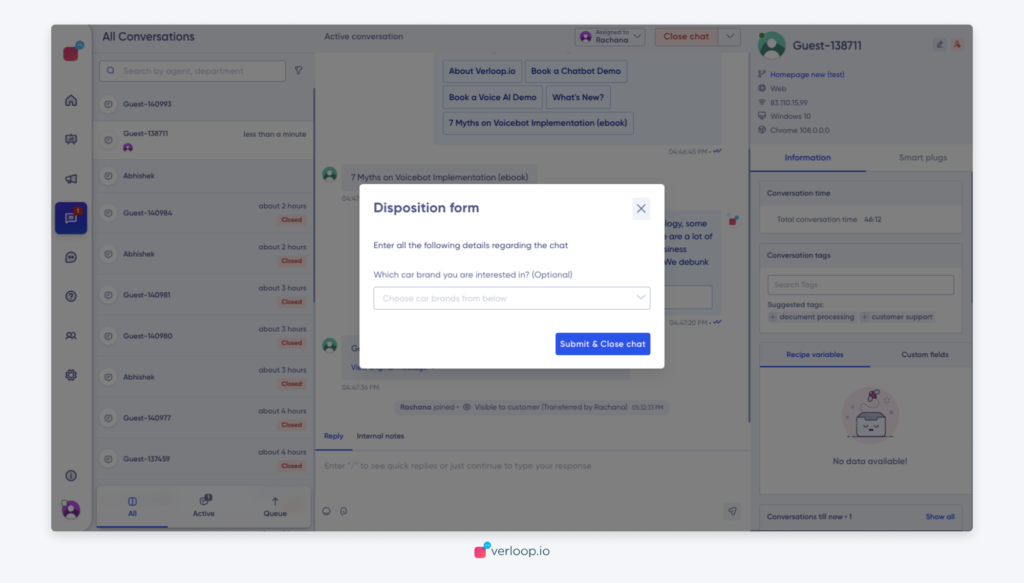
Filling the form
The form will be triggered once the agent closes any chat, in their live desk customer management dashboard. They can then fill out the form right after the call.
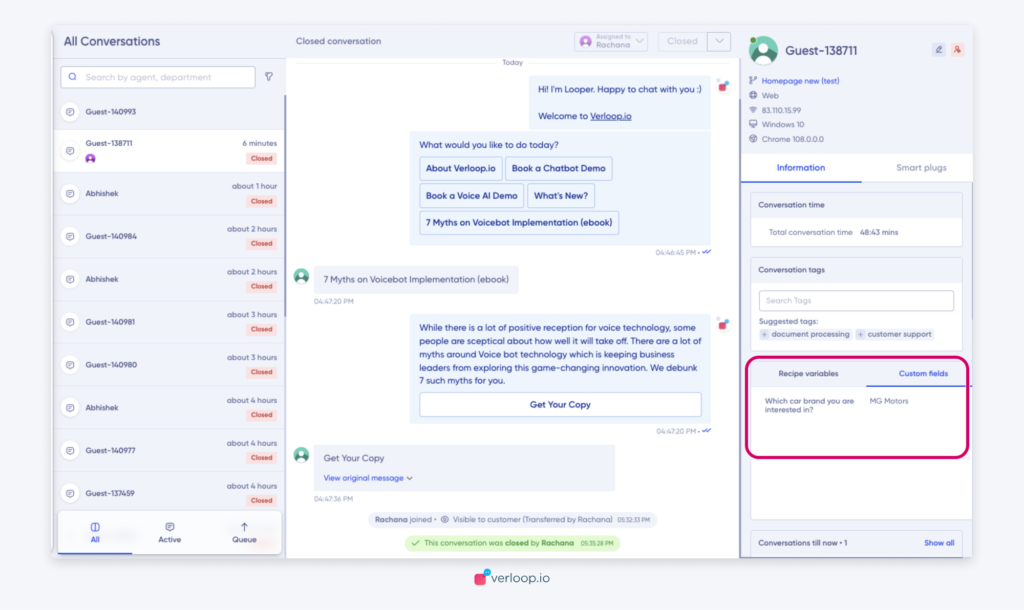
Data Visibility
Once all the variables are updated you can see the form as soon as the agent closes the chat in the live chat room, by clicking any closed chat.
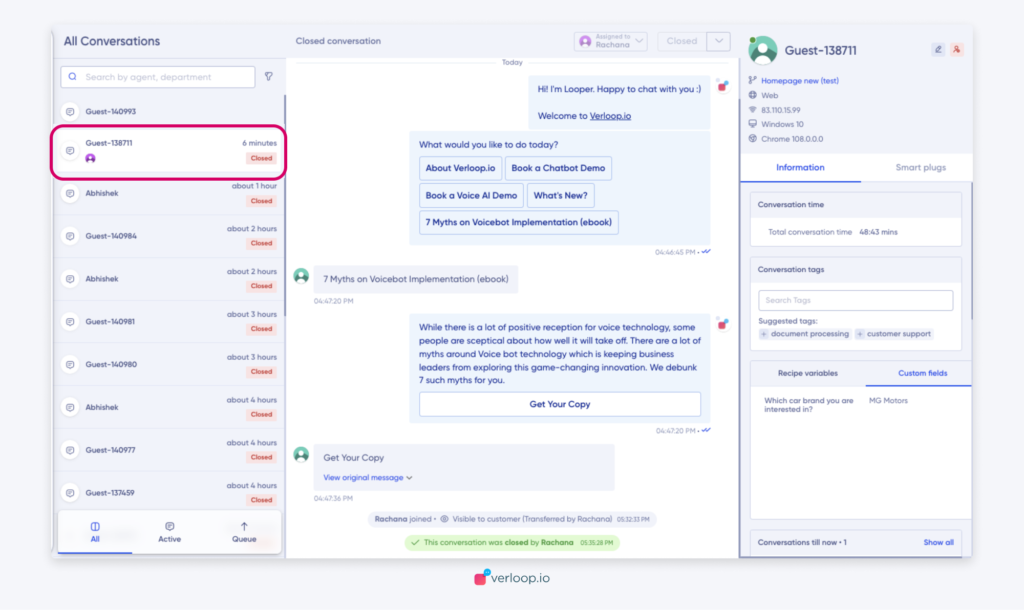
Click on the chat in the live chat section and the RHS, you can see the values against the custom variables in the variables section.
List and Tags labels have multi-select options and Dropdown is a single select label.
Access
- Agents have the access to only fill the form while closing the chat.
- Admin/Manager can create and customize the form as needed.
- Admin/Manager can view the variable responses.