CSAT forms enable companies to track their customer reaction to their services and support systems. We can obtain a CSAT score through a quick survey through any of the communication channels.
Clients also have the option to use the default form already available on the Verloop.io dashboard.
Building a CSAT Form
The form is a collection of 3 types of labels:
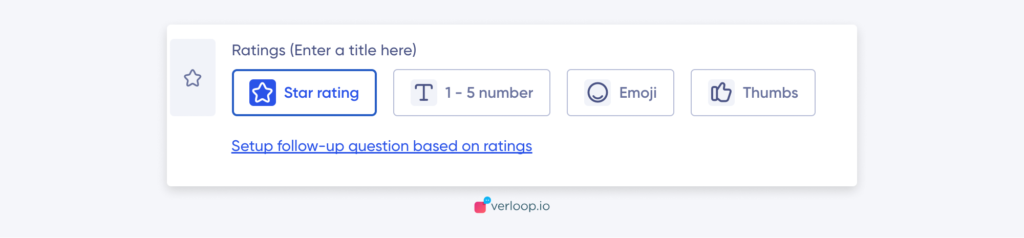
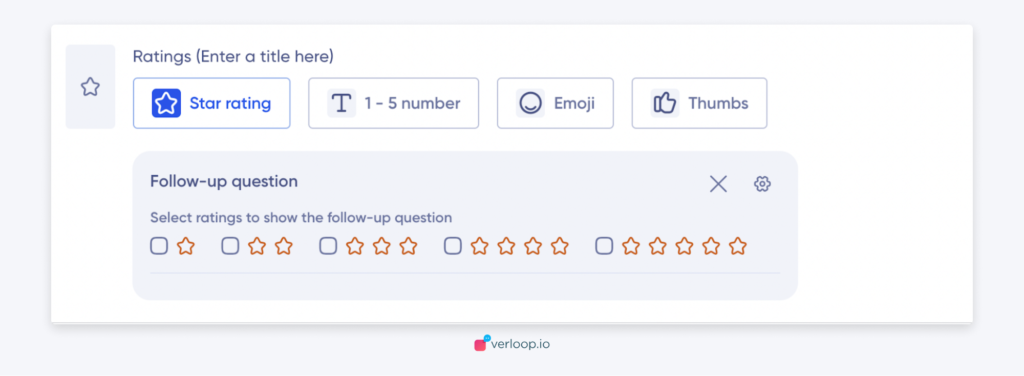
1. Rating: Under the Rating label, the admin can give the end users the option to give interaction satisfaction based on the following criteria
a. Star Rating: Out of 5 stars score
b. 1-5 Number: Customer Satisfaction from 1-5
c. Emoji: Customer Satisfaction based on good, bad, excellent, etc emojis.
d. Thumbs: A simple thumbs up or thumbs down reaction
2. Free Text: Text field option to submit a written feedback

3. Button Group: It is a multi-select label in which the admin can give multi-select options. Can give 1 to 15 different options for ratings. Per button character limit “20.”

Note : You can make any label:
- Mandatory by clicking on the mandatory toggle button in the label settings.
- Delete it
- Or duplicate them as needed.
Now let’s get into understanding how you can create the form (only the admin has the access to create the form).
1. Go to settings on the Verloop.io dashboard.
2. Then click on the “Chat” option, from the “setting” list.
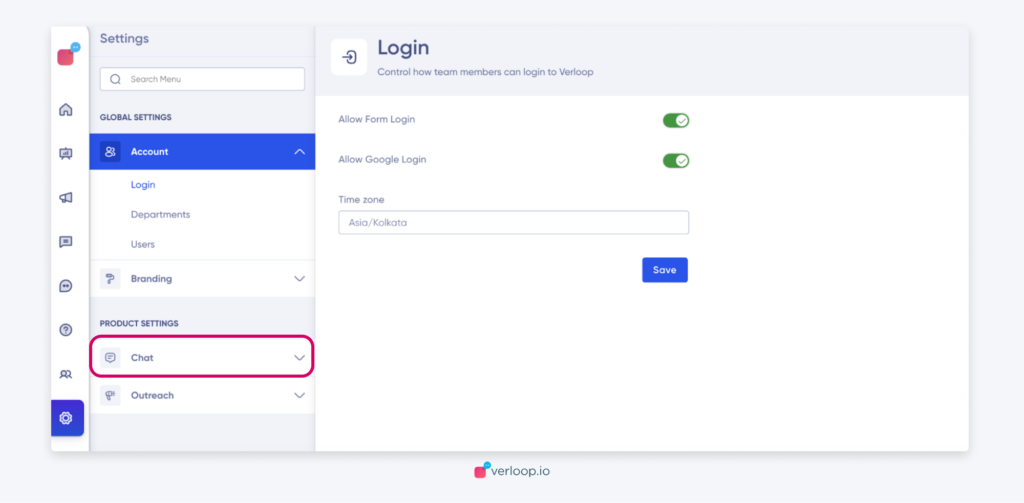
3. Once you click on “Chat”, go to the “CSAT Form” card and click on it.

4. Post-clicking on “CSAT Form,”, you will see two options
- Default CSAT Form: Click on it to use the already existing CSAT form.
- Add another form: Click on this to create a customised form from scratch.
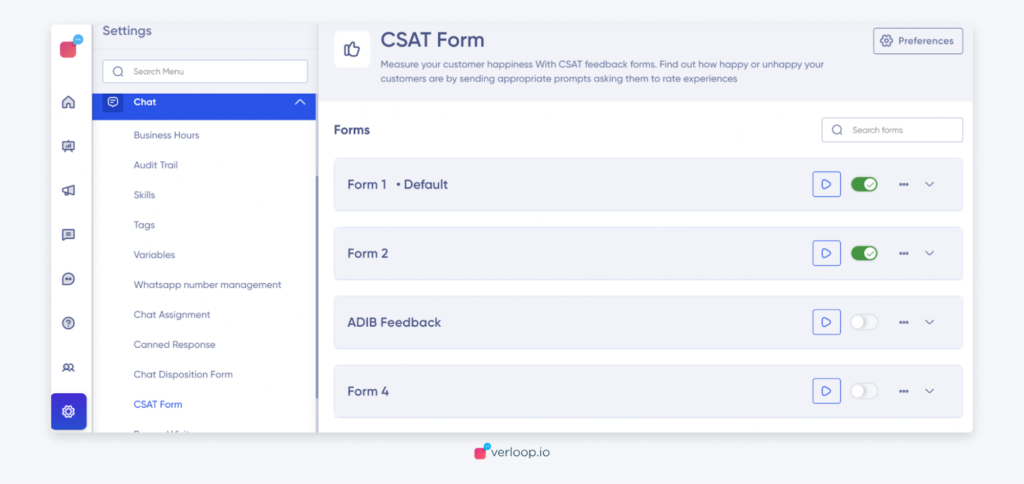
5. Click on one of the above mentioned labels based on how you want to collect customer feedback. And Add a name for the form in the placeholder which shows ‘Form 2’. Ensure it’s unique for easy recall.
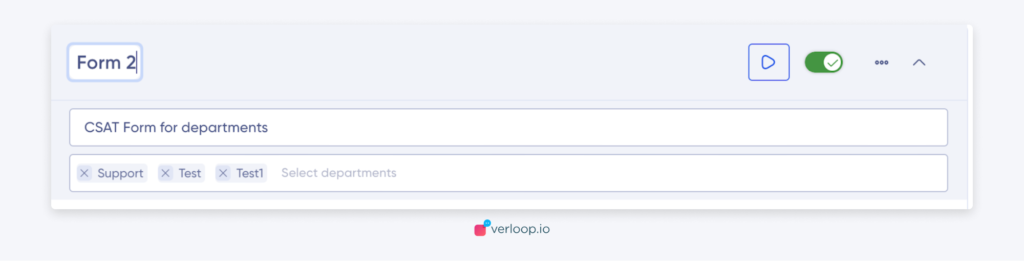
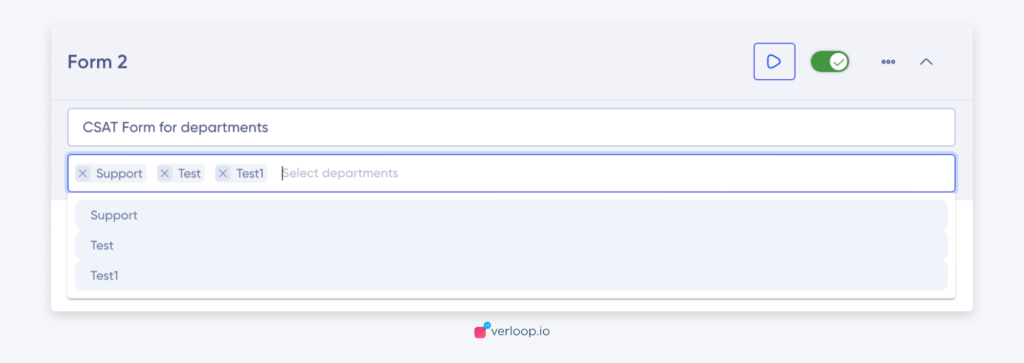
6. Then Add the department for which you want to collect the feedback.
Note:
- You cannot have different forms for a single department.
- When the chat is closing, the last department information will be used for the form.
- You cannot repeat the department once used in one label for consecutive labels in the same form.
7. For CSAT calculations, click on the question’s settings, then click on the “Use the CSAT calculation” toggle.
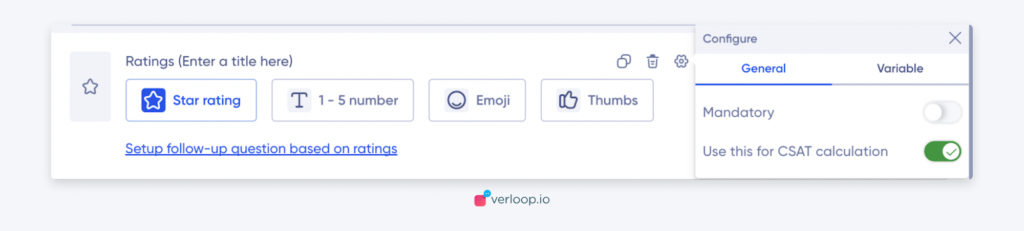
Note: In a single form, you can make the CSAT calculation mandatory for only one question/label.
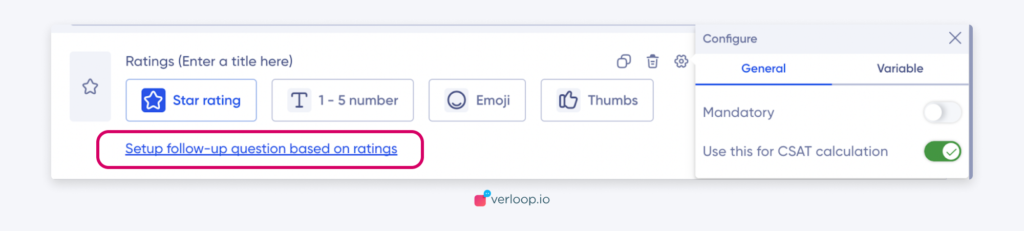
8. Add follow-up questions for the CSAT: Under the label, click on the clickable text “Setup a follow-up question based on the rating”
9. Select the options(multi-select) for which the follow-up questions need to be shown, under “Select ratings to show the follow-up question.”
10. Then enter the title in the “Enter a title here” placeholder.
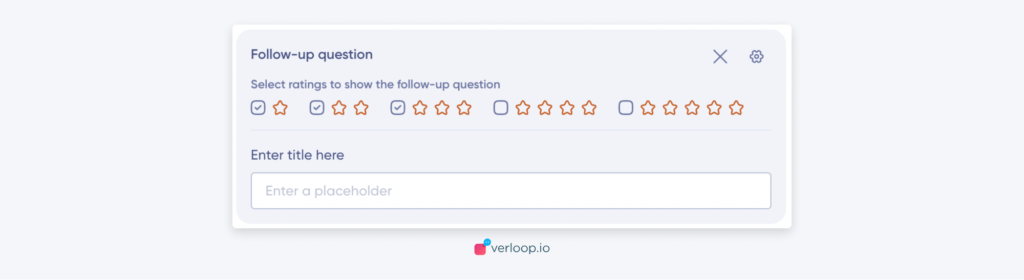
11. You can also enter the answer placeholder value you want the customer to answer in, by adding the description in the “Enter a placeholder.”
12. To make the follow-up question mandatory: Go to settings in the following question and click on the “Mandatory” toggle button.

Write the number of ratings for which you want the question to appear in “Enter the number of ratings”(it will change based on the rating type/label chosen before). So if the rating is equal to less then the question will appear.
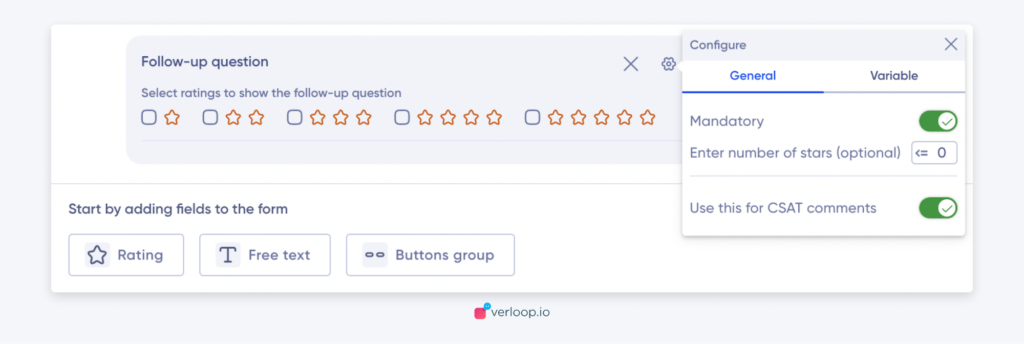
13. To use and save the CSAT comments, switch on the “Use this for CSAT comments” toggle.
You can give a custom variable name saved for viewing the comments and responses or it will be saved with the default question title name.
NOTE:
- If you have not designed a CSAT form or turned off the CSAT form, the default CSAT form will be used.
- CSAT is calculated:
(Total number of answers/Total number of questions)* 100
- No linking in the CSAT form, all fields are independent of each other.
14. Click on “Save” to save the form.

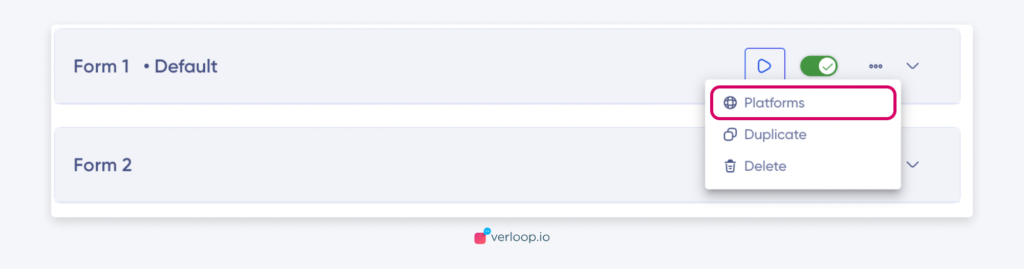
15. To view the form click on the play button.

Choose channels on which CSAT should be asked.
- Click on the ellipsis menu or three-dot menu option.
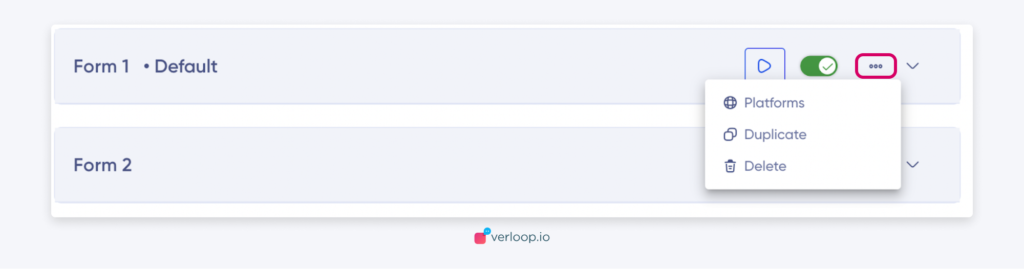
2. Click on the first option “Platform” to choose the channels on which CSAT should be triggered.
3. All the platforms will be shown in the platform dashboard.
Click on the toggle button of the respective platform to switch on the CSAT trigger. Platforms: WhatsApp, Web, Facebook and Instagram.
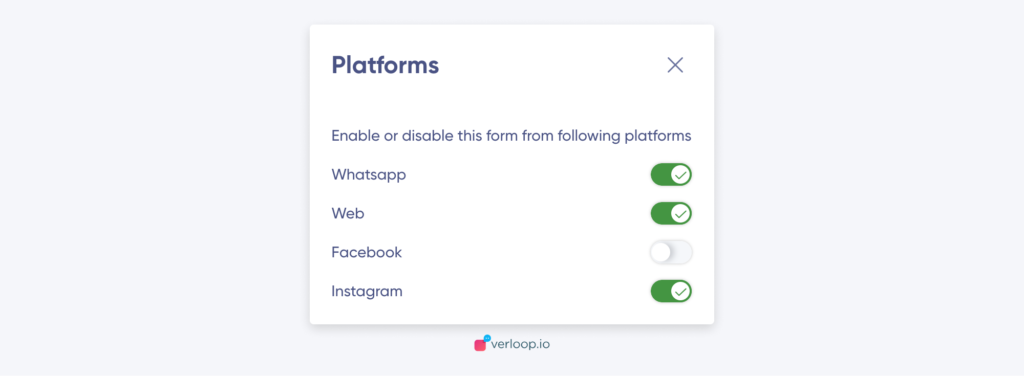
Note: You can select multiple platforms.
Setup for Triggering the CSAT Form
1. Click on the Preferences setting button, placed in the top right corner of the dashboard.

2. For conversation happening over Bot: Go to the Bot trigger option to select the conditions for CSAT to be triggered by switching on its toggle button.
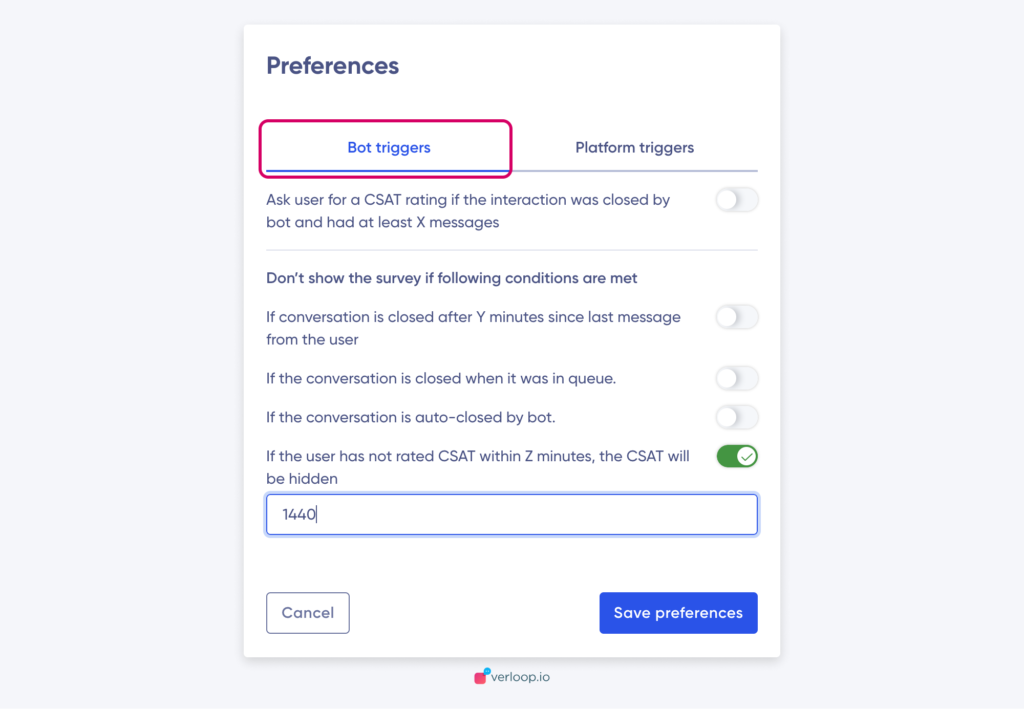
Click on the toggle for the conditions you want the CSAT to be triggered and Conditions for which you don’t want CSAT to be triggered.
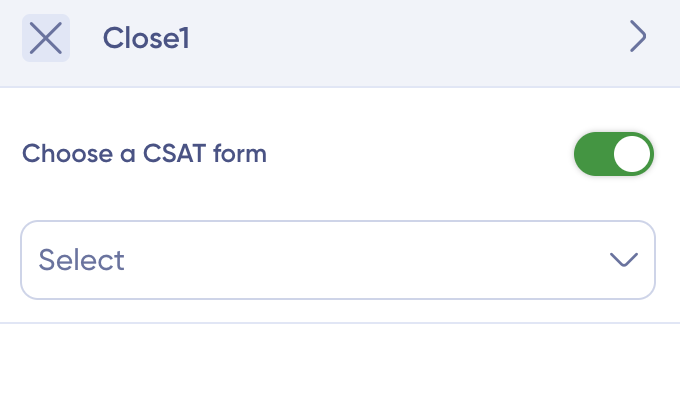
In the advanced settings of the Close Block, you have the following options for managing CSAT forms:
- The CSAT Form Toggle now allows you to effortlessly control whether a CSAT form is triggered when a conversation ends.
- Toggle Off: No CSAT form is triggered.
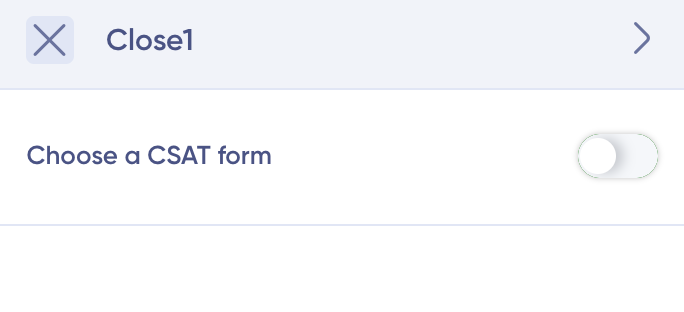
Toggle On:
- If a Custom CSAT form is selected, that form will be triggered.
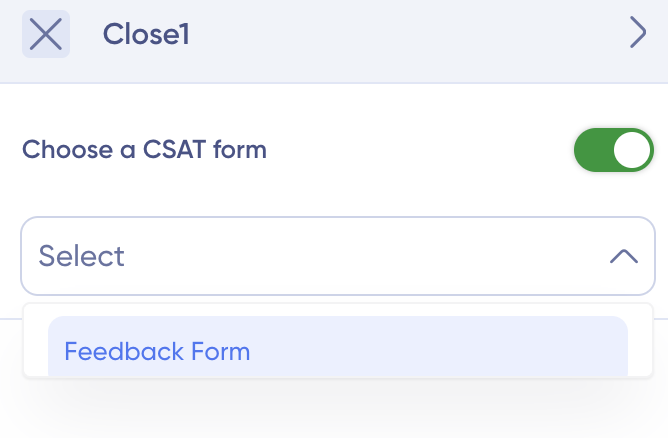
- If no specific form is chosen, the default CSAT form is triggered.
Once set up. You can test these features on the bot builder interface itself to see how they work in real-time.
In the Live Chat, once the conversation has been closed and the CSAT form is triggered, the end customer has an option to collapse the CSAT form and also ‘Start a new conversation’.
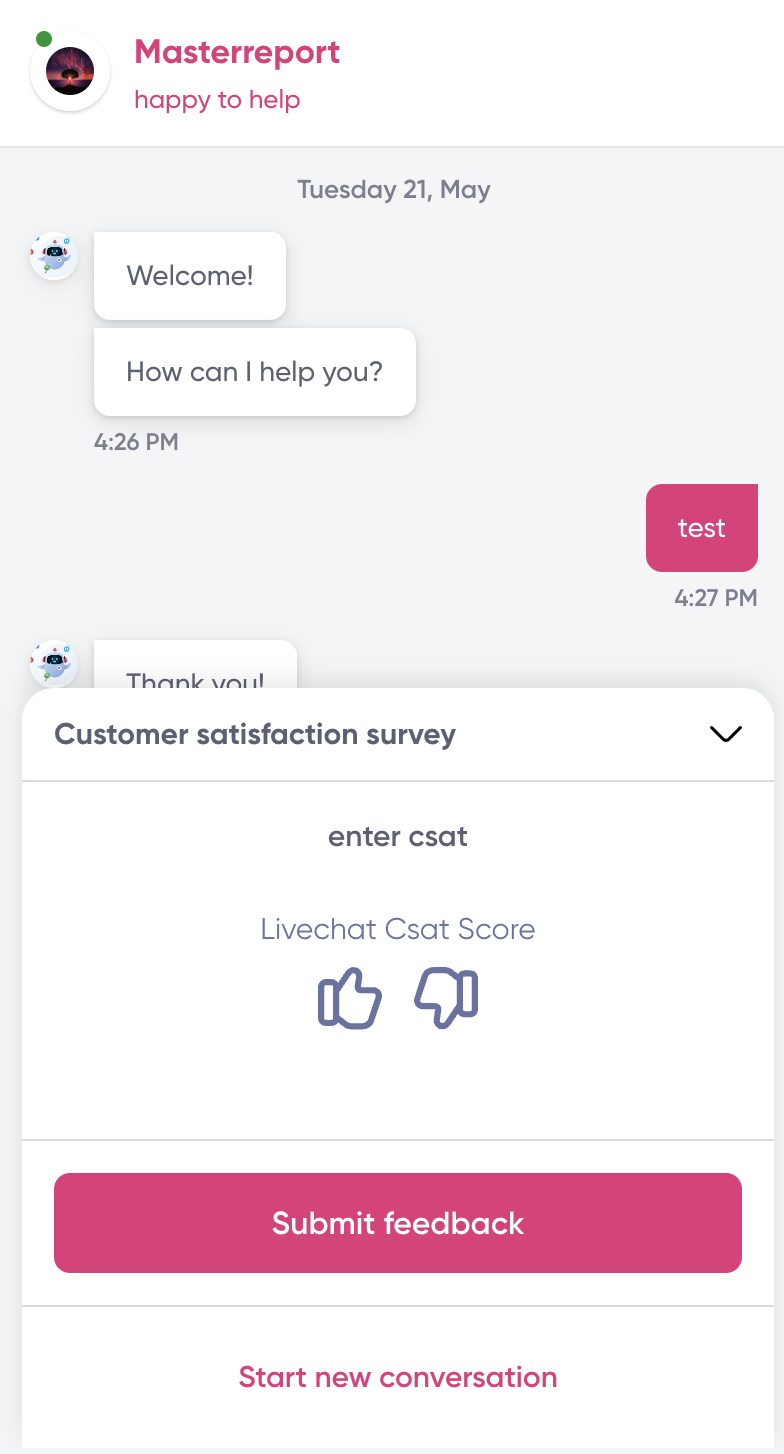
These options provide you with the flexibility to gather customer feedback seamlessly, enhancing the overall support experience.
Condition for Bot CSAT Trigger
i. Ask the user for a CSAT rating if the interaction was closed by the bot and had at least X messages (The count starts from the start of the chat, including both customer and bot messages in the count)
ii. Don’t show the survey if the following conditions are met
- If the conversation is closed by the system after Y minutes since the last message from user.
2. If the conversation is auto-closed by the bot.
3. If the conversation is closed when it is in the queue.
4. If the user has not rated CSAT within Z minutes, the CSAT will be
hidden.
iii. Now for the Conversation happening with agents: To trigger CSAT for agents’ CSAT scoring, click on Platform trigger.
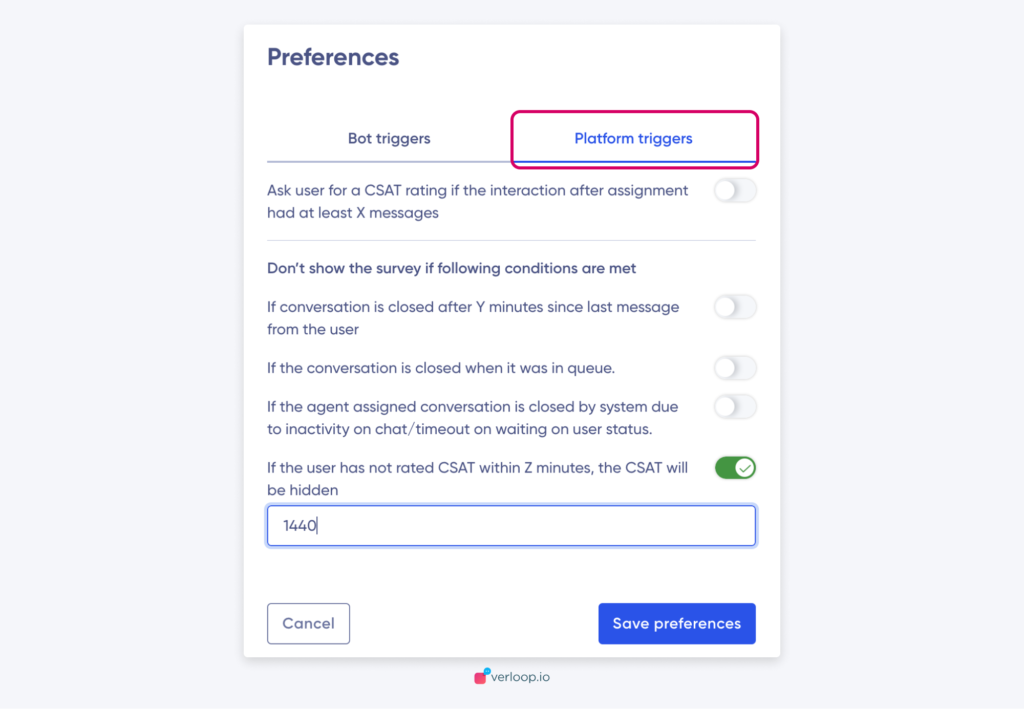
Click on the toggle for the conditions you want the CSAT to be triggered and Conditions for which you don’t want CSAT to be triggered.
Conditions for Agent CSAT Trigger
The feedback will be available under the reports.
Two new fields will be added to the reports against each chat now
1. CSAT triggered time hh:mm: ss
2. CSAT received time hh:mm: ss
3. This will be used to calculate CSAT response time on RTD etc
CSAT Triggered AT
This column will show the timestamp when the CSAT was trigerred to the end user by the bot.
CSAT Submitted AT
This column will show the timestamp when the bot received the CSAT score from the end user.
Csat_ _Variables
This column will show the values that the bot will save inside variables on the CSAT form based on the feedback from the end user. There could be multiple columns based on the number of variables present on the customized CSAT form, the format will be CSAT_ _<variable1>, CSAT_ _<variable2>, and so on and so forth.
All the field values submitted against the CSAT, CSAT comment, and custom variables linked respectively by the admin will be shown accordingly in the report.
CSAT Whitelabel
CSAT White-labelling allows you to mask the CSAT URL of Verloop with a custom domain of your choice.
Before Whitelabeling URL : csat.verloop.com
After Whitelabeling URL: yoursubdomain.yourcompany.com or simply yourcompany.com
How to enable Whitelabel?
Step 1: Update verloop’s CSAT URL domain in your DNS settings.
This URL is specific to your client’s id on verloop.io.
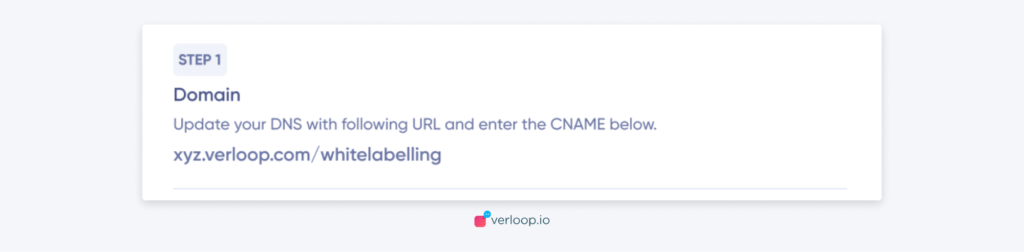
Go to DNS settings, create a CNAME DNS Record and adds a text record
Click on “Save.”
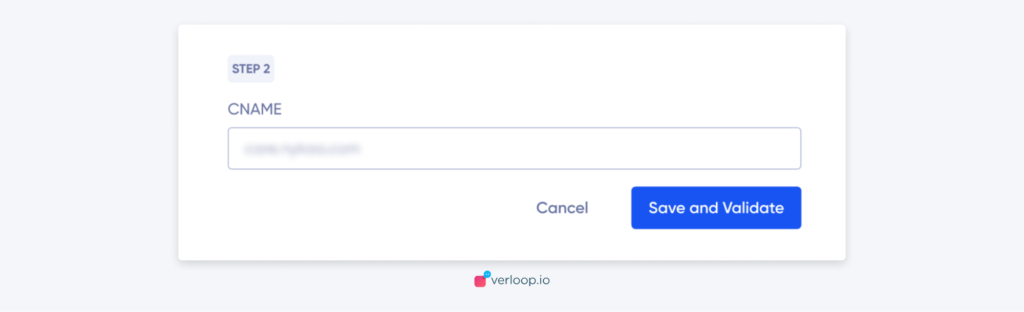
Step 2: Request Verloop.io to create a “name” of your choice which we can use to white label the URL and opts to save and validate.
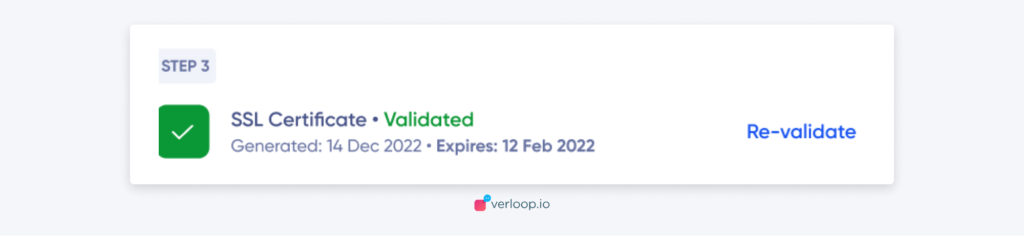
Step 3: We create SSL, while we are doing this, a message will appear:
“SSL Validation may take up to 24 hours. You will be notified over email once it is done.”
Note: If the SSL certificate generation fails, we ask the customer to “update CNAME again.
How does the CSAT page look to the end customer?
- Web/Live chat: After the live chat is over, the below screen will pop up to take the CSAT feedback from the end customer.
Whatsapp, Facebook Messenger, and Instagram: For the end users, who are conversing over WhatsApp, Facebook Messenger and Instagram, the below message with the feedback link will be shown.
On clicking the link, they will be redirected to the feedback screen as shown below, where they can provide their feedback.
Once they provide their feedback and click on “Submit Feedback”, they will be redirected to the below “Thank You” page.
CSAT Collection
For CSAT collection, there are 3 scenarios we have considered, they are as follows:
1. Mandatory Field and Rest Optional Fields
Consider there are 5 fields in the CSAT collection conversation flow, out of which 2 are mandatory and others are optional. In this case, after giving the feedback, customers will need to click on the “Submit Feedback button”, at the end of the conversation to register for CSAT.
2. All Optional Fields
Now let us consider a scenario where all fields are optional. If customers provide feedback for one field, CSAT will be registered without the need to click on the “Submit Feedback button.”
3. Only 1 Field
In the scenario where only one field is present in the CSAT conversation flow, the customers don’t need to click on the “Submit Feedback button” to register their feedback. They can click on the rating field, for example, and the feedback will be automatically registered.